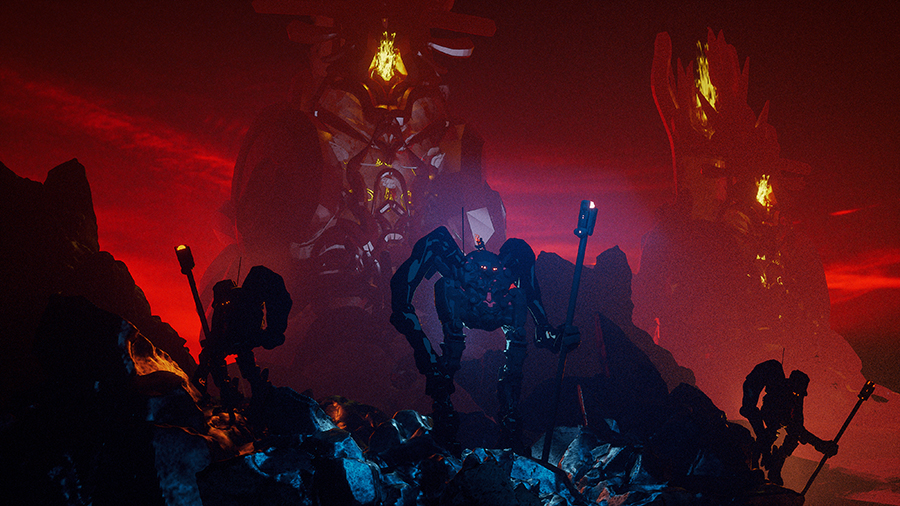
So, hey, everybody. Thank you so much for being here. My name, as she just said,
is Casey Hupke. I'm currently the Director of Visual Effects for my dream job at a
company called Cylance. We're a data science company that creates an AI-based
anti-virus product that I'm pretty excited to be doing, you know,
visual stuff for. We just did an augmented reality application that's been my baby
for the longest time now, along with, you know, the amazing team over there.
I brought along my reel as well as some video samples that you guys can see of the
stuff that we've been working on. We just did a whole bunch of booth graphics for
Black Hat 2017 that I was just at before this week. So if my brain gets a little
discombulated and I call Voronoi fracture regular fracture or something
else, just remember this is convention two for the month for me.
And I'm really happy to be here, so thank you so much, MAXON, and everyone involved.
All you users, everyone who's been sending me tweets and stuff saying,
"Congrats, good luck, have fun," I really appreciate it, and that
means a lot to me. So I will go ahead and kick off my reel.
♪ [music] ♪
All right, that was my reel. And then now I want to show you guys a few of the video
projects that we just did for this trade show. Actually, this is the first thing
that I worked on when I first started at Cylance was this quick little ident.
I had just gotten access to the Cycles 4D beta, and a lot of this...all this
fracturing and stuff that you see going on here, this was all done with a technique
that I'm going to actually open up with using the Voronoi fracture object to make
this, like, recursively noisy, gridded, dense pattern on a lot of the stuff.
And Drew, I'm sorry that the logo shield is still so big. It should be the size of
the C. All right, let's close that one. So that was my
first project that I worked on there. We just did these
three videos. I was working with this awesome just prodigal
master, Kris Cook, or Too & Flow on the Motion Design Slack, or Twitter,
or anything else he's on. Kris Cook, Too & Flow, this guy is so fun to work with.
We made all these screens to project at our booth on these LED walls,
and, again, a lot more greebling and small detailing and ex-particles,
fun stuff going on. But, you know, I can explain the branding, if we talk in the
back more about what all this stuff is. But we had this whole,
like, science-y back story for this whole world. And we had to make all these trade
show graphics and pretty proud of where they came out. I'm currently rerunning all
of them at 4K with motion blur and depth of field and all other kinds of craziness,
and this is probably my favorite one from the booth. These were
just about, like, the product features and details.
I built this monster greeble generation structure mangler, and Kris handled a lot
of the ex-particles on the shell and stuff. And we just worked together for
about a month and a half just on eight 20-second loops for Black Hat.
And I just wanted to really give these a shout-out because none of you guys have
seen this stuff yet. Only a bunch of cyber security professionals have.
I just brought the three that I thought I had the most fun kind of working with.
There's a whole narrative story behind all of these, and we're going to be releasing
a breakdown, behind-the-scenes, and all kinds of other stuff about these in the
upcoming month, I think, hopefully sooner. But,
you know, 4K renders take a while, so it'll be a while.
And then we made these. Kris was...I just wanted just to plug Kris one more time.
He has this amazing methodology for delivering hardware previews that makes
them look like product deliveries, and Drew and I were so stoked on how this
stuff looked. We were like, "Why don't you just give us all the hardware renders,
and we'll use those for our party graphics?" And he was like, "Wait,
really?" So we literally, for our party graphics, used a whole bunch of just,
like, well, you know, a bunch of really awesome ex-particles hardware renders
using my greeble monster that basically makes sure that there is not a single
polygon, an object that is the same size as any other in a
specific group. It's a whole monster thing that I'll be releasing
as a free thing on the internet soon. But yeah,
so that's some of the stuff that I've been working on over there.
Today, I am here to jam on the Voronoi fracture object and its updates in version
19. I think it has some of the most amazing little hidden features inside of
it of any generator in Cinema. I mean, everyone that uses Cinema knows that the
Connect Object is the best generator in the entire package, but Voronoi fracture
is right there next to it in terms of power and usability.
That being said, in the first thing that I'm going to show you...
I actually watched Nick's presentation, and we share some of our stuff.
Obviously, Nick does his things a certain way, and I'll do my things a certain way.
And I'm sure this will not throw me off in the least. I'm going to my presentation in
reverse, just so I can start with this thing and not have to rush through it at
the end. Because I think this is a really good example of how using things in Cinema
in an unintended way created an interesting visual look that, once
someone, you know, gets that and once people start hacking at it,
it becomes a thing that is just, like, unanimous, like the atom
array as a hologram in a film, so, yeah.
Oh, yeah. You can follow me on Instagram or Twitter @darthcasey.
All right, so I'm going to try to just drag this over onto here.
I'm going to pop into my empty scene, and what we're basically setting up here is a
little sort of like an FUI mini map generator. It's a fully procedural,
top-down map generator that I figured out how to... I came up with it just looking
at some content browser, and I think I was talking to Yader. I'm going to say Yader,
just because everyone loves Yader, but let's just go ahead and get right into it.
So, the first thing I'm going to do is create a plane to show you.
I'm going to move this up off my plane surface. I'm using some of the new
viewport things just so it looks a little prettier. All right,
so I have my plane, and I want to create a Voronoi fracture object.
Oh, also, throughout the presentation, I'll probably never get near the menu
items. I'm going to keep using this thing that pops up. If you're not familiar with
what it is, it's called The Commander, and it can call every single thing that you'd
ever want to do in Cinema. And it will also make you
forget every single hot key. It's a bit of a dependency problem for me.
So drop my plane on my Voronoi fracture object, and I get what you would expect,
a cellular pattern of breakup and division that allow me to, you know,
drop this thing, make it rigid and go to town. But inside of our new R19
version, we have this really interesting way to manipulate the objects,
so we can offset the fragments to make small things. And when I originally saw
this, I was like, "Oh, it kind of looks like a city." But I can't quite get the
pattern of this to be super gridded, and it's always going to look cellular.
And cities and stuff don't really look cellular, so I started playing with the
ability to use other objects as my point source.
So I'm going to go ahead into my sources and add this polygon object,
and I'm going to delete the point source. So the polygon, when it first drops in,
gives me a perfect crosshair right in the center. I can move this wherever I
want and create crosshairs. I'm going to move these up on top, so we can see them
on top. I can move them. I can duplicate it, slide it, move it over,
drag it into my source. And then I'm getting, you know,
a little bit more of an...I can adjust how these work.
One thing that I was doing was creating this, like, sort of like...like,
in "Ghostbusters," Venkman's little ghost detector thing had this little Y connector
thing that was moving around. Go watch "Ghostbusters" again if you don't remember
it. But it basically looked like this thing moving up and down,
and I was like, "Oh, that'd be cool to, like, make a displaced...what's it called?
What are those things called with the glasses of multi colors? That's right,
stained glass. And then, also, if I increase the segments of my polygon
object, I can start creating more subdivisions, so I can create
these interesting shapes that started to, like, look, to me,
a little bit city-like. So I'd add in another one,
drop it in. Oops, not move that one. Move this one, create more,
break it down. And I kind of started creating this, like, sort of, like, a city
scene, and I was like, "Oh, this is getting really cool."
So inside a Voronoi fracture in R19, we can take this same system and invert it.
And then once I inverted it, I was like, "Oh, man, I have streets." And I can
do...update, update. I can take my polygon objects, and I can shift these scenes
around. It's going to update not strictly on the same time when it's in the
viewport, but when it renders, it does a really good job at sticking together.
And I was like, "Oh, okay, cool. Well, I've created this sort of topo street.
Now what I can do with it? I want those buildings to look like something."
Well, using the power of the Connect Object, I took my basic city shape one,
grouped it, added a MoExtrude. I want to make sure the object is able to be
affected by effectors. So I'm going to change this to Per Step,
and I'm going to change it to 1. And then I'm going to, with MoExtrude
selected, hit Shift+C and create a shader effector. As EJ says,
"This is the last shader effector you'll ever use." I'm going to go to Shading,
and I'm going to add a noise. I'm going to change my noise to Electric,
and I'm going to go to my shader effector. And instead of having it use its default
parameter of Scale, I'm going to go ahead and use Position,
and I'm going to add some Z...no, not Z, or Y. I want Z.
So, I started playing with this, and I was like, "Wow, I just, like...
I just made a little city using the Voronoi fracture object." I have complete
control over the width of the roads. I have complete control of where the streets
are. I can use these polygonal objects to shift around where the buildings are,
and I can make a little arch-erectable surface. So this got me really excited.
I was like, "I figured out something with the Voronoi Fracture tool that I haven't
seen anyone post about yet." But, again, I've also been working really hard,
so if you did post about this, and I am stealing credit from it,
I'm on stage right now, and you're not. So yeah, I got to figure out how to make this
cool little city thing, and I was really, really excited.
The other thing that I started doing with this, and I did this inside of the logo
ident that I showed you, was I created this greebling surface out of it using the
same methodology. So I am going to go ahead, and I'm going to select all this
and put it inside a null. When I go to my Layer Manager,
I'm going to drag this into here, and I'm just going to turn this stuff off
so I can show you really quickly the greebling system. Actually, let's
salvage what we just did as a starting point for it. What did I skip? That, city.
So I'm going to grab our version with the Connect Object in it and our null here
because this has our polygon objects, which is our source for this Voronoi
fracture object. I'm going to CTRL+drag all of this, and I'm going to make a new
layer, and I'm going to call this Greeble. So let's go ahead and take this and make
it... I'm CTRL+dragging onto my layer source here with one object selected,
so that way, it makes all children part of it. I'm making sure all my other
generators are off because I don't want to deal with having any weird overlaps.
But, okay, so, let's go ahead and get rid of the Connect Object. So I'm just going
to really quickly create a polygon object to use as our source. I'm going to drop it
in just like before. We can see that we have this grid pattern happening.
So I'm going to crank this one up to, like. 6, and I'm going to turn our offset
fragments back down to 0. And so this was basically
how I started thinking about these non-uniform surfaces.
I saw that happening, and I was like, "All right, so how well can create a
greebled surface, a multi-pass, playing around with making cell shapes
that were just a little bit different than before, trying to, like,
find the right spot in the surface?" I could never... I eventually did figure out
a nice way to get all these spots that you're seeing that have triangles and
everything to not overlap the same, but I was doing this on a much bigger building.
I can't remember that guy's name right now, but he makes those,
like, KitBash kits that are all those, like, crazy futuristic cities.
I'm sure, as motion designers, you guys all know about his work.
But I was setting my planes up around that object and sort of projecting this
greebled surface onto it. And then, using MoExtrude, dropping it into my
hierarchy, let's just group these together, so it's not doing
everything, and then giving it my shader effector again. On the MoExtrude,
we can go a little bit...we don't need four extrusion steps because you just end
up with this just gnarly amalgum of just edges and cruxes and weird stuff. But
yeah. So then I just started playing with point counts on the segments and,
you know, making them bigger, making them smaller, moving them around,
and you end up with, like, these slashes that happen. But with fall-offs and stuff
and when you're looking at it, like, on a huge object, it was just a really cool way
to, like, kind of come up with, like, little smaller pieces and larger pieces.
And I've just been obsessed with greebling detail on objects and not having quads and
making sure that there's nothing quadratic about my equation.
Math joke should have been on the SIGGRAPH Bingo.
Okay, so, the next thing that I was doing... I'm going to save this layer and
just disable all this stuff, because I think Rick and all the guys take these
files and save them and put them out later. Text, when you're doing text
animations with, like, Mo Text or anything else, I've had to do so many projects
where I have, like, an endtag or, like, something that involves doing the
following, using poly effects on my typography to make it blow up.
So if it's like, "Oh, yeah. We want our logo to form particles," this is where
you start. You go, "Poly effects," and you're like, "Ah, but my topology. Like,
can we not get triangles?" And it's like, "Ugh." I mean, we could remodel and
re-topo your whole thing with Polygon Pen. Then, using the same sort of thing that...
Well, this is how I got to building that city and building that greebling
structure. I created a Voronoi Fracture object in R18, dropped my endtag into it,
inside of Sources, when I hadn't removed it, saw that all my faces had their own
little selections. Created a plane, rotated it up 90... I'm holding Shift to
make sure it's only going by units of 10, dropped it in, saw quads.
And I was like, "Oh, quads." That was a very easy way
to create quads on the surface of my object that I can
control by scaling the object down, and I can actually make them smaller or bigger
in certain sections by using a plane with more or less pieces of flare.
I couldn't think of the word "polygon" for a second. And then,
you know, turn on my poly effects. I said turn on my poly effects.
Maybe I had to make it editable. Oh, my random's off. There we go.
And the poly effects kicks in once the Voronoi Fracture object...oh,
we're still creating cells. I went a little ham on that. Let's go lower for
viewport performance. But I was able to start eliminating a lot of my issues with
using poly effects on type by creating these planes that chopped the object up
and helped me eliminate the triangles by increasing my cellular divisions in
various spots, getting me, like, to a much more confetti-like structure.
And also, in the Voronoi fracture in 19, I'm able to sort the results.
So I can say that I want to have the effect only take place, you know,
all in Y. So let me go ahead and do this random and give it a box fall-off.
Actually, this would be better displayed using...and I'm going to make this a
little bit smaller, so it has no depth. It's just a flat surface now.
And I'm going to kill my other source, so my viewport updates a little faster.
All right, okay. And now, Poly Effects, I'm going to
give you a step effector, and I want to sort in
Voronoi fracture. You know what? The sorting might not work the same with this.
Let's go Distance to Object. No, let's stop that. Let's move onto the next thing.
I just looked at time, and I have some other stuff I want to do.
But anyway, type, you can turn into quads with a Voronoi fracture object.
It takes some art direction and massaging, but it's a lot better than re-topologizing
your entire piece of topography or logo from an EPS, and it's
saved me a lot of time. The last thing that I
want to do is say that we should never, ever,
ever, ever, ever use an atom array again for FUIs and movies and film.
We shouldn't use it. We can now strictly do better. We can take our Voronoi
fracture object, offset our cells, invert, make it whole-only,
and give it a little thickness. And then, in our sources, we can even go beyond
that, add a shader source, add any noise you like, and create animated,
non-uniform cellular structures. Just use, like, a 0.2. Shout-out to everyone that
worked on "Tron: Legacy" for creating this stuff in the most hard way possible.
When you guys were doing all those, like, really, really, really complex things that
made everyone else go to use...like, weird spline connections and spline bulls.
Now, we have this, like, really, really fancy Voronoi mesh generation that, if
you use, like, a subdivision surface on, you can get a really smooth look out of
it, and you can create these, like, really alien structures. You can go back and make
them very thin, and you can use all kinds of different sources and change the
subdivision amounts and really get in there and create these, like, rigid
structures with the right noises. You can do the same methodologies I just showed
you with a plane to chop it up cubically. The Voronoi fracture,
like I was saying, probably now my favorite generator in all of Cinema 4D.
All right, so, let's do my favorite thing that I saw that I didn't know you could do
until the great and powerful Wizard of Donovan Keith posted this as a new feature
for Cinema 4D R19. So what I'm going to do here, I have a cloner object.
It's a 2x9 structure. It's making some bricks. We're going to build a little
tower. All I'm going to do... I have a linear cloner object that's right here...
I'm just going to drop this in here and create a little tower.
So, previously, on rigid-body dynamics, if we had our object bump into it,
it would just, you know, smash, move the whole thing. I can go into the State,
go to Collision, make sure it's set to All. They'll fall over,
like, individual pieces. I can add this underneath it as well,
but it won't work the same because I didn't do something correctly.
That's not the point. What we're going to do now is do this really cool thing with
the Voronoi fracture object and its ability to handle
the instances inside of a cloner object.
So I'm going to make a Voronoi fracture. I'm going to drag this into it,
and I'm going to turn off Colorized Fragments. And I'm going to go to Sources
and remove them. Actually, before I do that, let me show you what just happened
there. So colorized fragments, you can see that every clone is a fragment,
but also, there is fracturing in there. So we'll come back to this, but
it's important to note that we're getting two separate builds of product here.
So I'm going to go ahead and remove this because it's going to create all of these
into their own cells, and we're going to be happy with that. I'm going to to this.
I'm going to add a rigid-body tag. I'm going to hit F8, and I'm just going to
go ahead and make sure I stack cloners to make a tower,
add V fracture, delete source, use most selected...ah, that's what I'm doing next.
I have this selected, and I'm creating a MoGraph selection
of just this base right here, this base section.
And within my rigid-body tag, I do not want...wait, no, I'm going to invert this
selection. No matter how many times, like, I've gone through this or rehearsed this,
I will always do this backwards. So we've got a little tower, and our
little Miley ball just comes in as such and knocks it over. I want to go ahead and
make sure that I do my dynamics on collision. But it just topples,
it falls over like a Lego city or a city of wooden blocks as one would expect.
What we can do now, though, is this really fun little sorting option,
nope. I already went over that. Detailing option, nope. Connector,
there we go. That's got to be, like, three slack drinks and two slots on SIGGRAPH
Bingo, I think. I'm going to create a fixed connector right now,
and then we're going to hit Play again. The sim time has gone down a little bit,
but now we have this reactive behavior between our Miley ball and the behavior of
the object. So we can do things like increase the
weight and the torque via going to our connector object.
So these numerical values right here, I am not an expert on what these specifically
do. All I know is that the more numbers I put in there, the stronger the object
becomes, and the fewer numbers I put in there, the weaker it becomes. I'm
not quite at that minute level of it yet, but that's one of the things that makes
Cinema 4D so awesome is that, with a couple of integers, we can play with the
way our object and our device works. And, like, say you're making, like, a tower of
Jell-O cubes. Like, imagine trying to make this like, you know, last week or trying
to make this an R17 or R18 or in another...like, we
couldn't do this sort of, like, rigid constraint.
And then, just as you would expect, these are all key-framable parameters.
So I can drop these here, move over here, and forget to set a new value...just set
an arbitrary key frame for no reason...and key frame them down to 0.
Make sure to slide click them on, hit F8, and watch the behavior as it rotates
through the values. We'll see it sort of tear in more. We'll see the connections
start to disconnect. Well, we'll see them as we get there. But right now,
it's not really able to be torn because the value that I'm
saying you need to do this on is much higher than it thinks it needs to be.
So right about now, we should start seeing the interactions become more break-y and
frigid-y. And if you set the right values and you set your objects up with the
correct sim amount, and these are much smaller, imagine these as, like, beams
inside of a building. So, if you think of them like that, we have this new ability
to do a level of dynamic destruction on objects that was previously just not...it
was not conducive to the way we like to work. We could do it. We could figure it
out as motion designers and as Cinema 4D artists. We're hackers.
We're going to figure that stuff out. If it's like, "This is the task.
You and a team of four people go figure it out. The 37 my guys over there will handle
all the character animation." And it's like, "Wait, this seems so
off-sided." Conversation for another day.
But the connectors also have this really, really cool other ability inherent inside
of them. I'm going to go ahead and delete track, and I'm going to lower my value
back to what it was at default. Let's hit F8 and make sure we have it.
It's kind of spongy, but still kind of break-y like we'd want it. If
you imagine, like, rebar inside, it helps. You guys imagining rebar? Okay, great.
So, now we have all of the other dynamic effectors. One thing I should do is show
you what's happening visually. I'm going to make these smaller.
This is a visual description of how the connectors work, what their strength is,
how they're currently aligned. And it's also, like, the most hidden,
sexy version of Plexus locked away inside of Cinema 4D that I want someone to figure
out a way for me to right-click Render Connections as Hair
on because I need that now. Patent pending.
Okay, so let's turn those off. That shows you how this connector is not just this
connector plus the cloner object and a cloner object.
This is actually a connector for every single
little individual instance, and it's drawing a connection between them all,
and our viewport performance is still just phenomenal. But we have every connector
type that you may be familiar with, so I'm just going to roll through them.
Wheel Suspension, Box, jump back, go Planner. Some of these ones have these
really cool behaviors that just get super wonky, that they go nuts,
and I want to figure out how to get in there.
If we lower the X, Y, and Z limits that we have available, we're going to get
something much different. But all this new behavior is attached to it,
and they all have these different characteristics. There's going to be so
much fun to have with all of this that... I mean, September can't come fast
enough. I can't wait to start seeing this in production with everyone else.
I'm very, very excited. Ragdoll's really fun. Like, Ragdoll really attempts to stay
all together, but this is going to be great for doing
high-density meshes and soda cans crunching and stuff.
Like, I think there's going to... I think people...someone's going to figure out how
to way... I've already thought of an idea. If I can put these cloners inherited to a
matrix object with, like, an inheritance defector on the points of a can and then
use the can to be deformed by the matrix object inside the Voronoi fracture object,
yeah, I'm going to do that. And I'm going to post that later. I'm going to talk to
Chris Schmidt tonight. That's all we're doing is figuring out
how to do a full can crinkle deformation using Voronoi fracture.
Okay, so, moving on from the internal structure of our breaking,
I'm going to go to the tower destruction bonus feature file that I've created.
We've got our cube, and now this is just one cube. So if I create a Voronoi
Fracture object using just this cube and drag and drop it into there,
make it a rigid body tag, it's going to immediately collapse because I didn't say,
"On Collision." I always mean "On Collision," but it's going to break and
chunk. And one of the cool things that we have now...and I'm keeping it low for this
until we move into the next part... I'm going to go ahead. Actually,
you know, I'm going to do the same thing I did before. I'm going to create a MoGraph
selection tag, and I'm just going to get these ones up here. And I'm going to go
to my rigid-body dynamics, and I'm going to drag this tag to there. So that way,
we have, like, a base platform that never gets broken, and even if Miley goes
swinging through it again, it's not going to hurt it. She's animated strictly via
Vibrate tag. I would prefer if she used a signal on that,
but I just set this up without signal. Sorry, signal guys.
Okay, so, let's blow this open. Let's go to our fracture object,
and let's go to Detailing. It's just awesome. Like, that's really the only
demonstration you have to give to show off detailing. This is geometry.
This is not, like, a displacement trick. It's got topology, and it's very well
done. I encourage everyone to go look at some of the Siggraph papers about
interconnected pre-deformation Voronoi fractures for high-detail rock simulations
and look at the math involved to the button that I just pushed for R19.
And just applause for the MAXON guys for always making this stuff just so
accessible to us, like, right when we want it and need it. Like,
we got this first version, R18. Everyone felt comfortable with it.
Everything was breaking on Instagram, you know,
for a few weeks. Now we have detailing.
Okay, so, the next thing that we're going to do is we're going to play with
connectors. Connectors are super important. So I have my base layer of big
chunks, and I'm going to increase my chunks here. I'm going to turn off
Detailing because the calculation time with what I'm about to do can get a little
bit long in the tooth. And I want to keep the viewport performance
going nice and smooth, so we can watch the demonstrations.
I'm going to create a new Voronoi fracture object, and I'm going to create...
I'm going to name... No, I'm not going to name it. I should've named this "MoGraph
Selection Tag." I didn't. My bad. So, Miley rolls in, like, right about there,
okay, so that's where I want to have, like, a better impact. So now
we're going to play art director on stage, and I'm going to say,
"But what if it had more there?" "I don't know. It's fine. It's fine." "Client's
going to want more there, though, man." It's like, "All right,
so I'll put more there, dude. Like, ugh."
All right, so I'm going to go ahead...oh, actually...yeah, that's fine.
I'm going to go to this area, and I'm going to select... In this object,
I'm going to use this MoGraph Selection to have my extra pieces only occur within
that MoGraph selection's range, so I can specifically art direct where
I want to have the bulk of my attack, if you will. I'm going to create another
rigid body, and I'm going to set it to On Collision. I don't have a platform base
here, so it's just going to shatter everything. So now what I'm also going to
do is take my Voronoi fracture. I'm going to move to this angle right here.
I'm going to make another mograph selection, and I'm
just going to paint where I want the hit to happen.
Like, say I had a ball that was going to a specific spot, and that's all I wanted to
have happen. When I go to my Rigid Body tag, I'm going to drop this in there,
and we're just going to work on this section here. We want to refine this to
the best of our ability. All right, so now I know I want the inside a little
bit...oh, wait. Actually, we want to make this a building, so I'm going to make this
a whole-only object. And it's going to shift up everything, so let me just redo
this mograph selection really quick. You guys see the extra
pieces happening as I'm painting them out?
The colors always change when you have a new scene, so I'm going to paint this one
2. Okay, and then I'm going to paint this area into this selection.
Oh, I'm on both objects here. There we go.
That's what I want. Hit F8, hit Play. All right, cool. But it's very,
very, very, thin, so I want to give this...not our top object.
I want to do this to the internal object, right? So now I have a thickness on here.
And what happened there? The thickness...oh, did I undo? Oh, I see what
happened. I had my cursor in there, and I hit Shift F. And Shift F is not a float
value or an integer, so it just turned it back to 0. My bad on that.
And now I have to redo my selections. All right, so these selections over here,
big swath, these selections over there. There we go. All right, cool.
There are some pieces floating, but that's not what I really care about, necessarily.
I want to go to this one, where I have everything, and I want to go to my
connectors. Yeah, I want connectors on this one, too. Let's use all the things.
Cool, so, you know, that's a little bit more dynamic,
and I also want to go to Geometry Glue. So watch how the pieces and the chunks change
when I enable Geometry Glue. Nothing happens, so I need to set it to Point
Distance. No, I'm going to set it to Cluster Type, and I'm going increase my
cluster amounts, or lower my cluster amounts, and this is going to take all the
existing cells and have them just get a little bit thicker. And the important
thing with this is...let me do it to the lower one because this one
actually...let's turn off Geometry Glue because this one's doing
all our extra fractures. So I'm going to enable
Geometry Glue on my lower one, and I'm going to set it to
Cluster. And it changes my entire MoGraph selection scene, so let me just get it
where I want it. Let me delete these really quick. Sorry, I forgot that these
guys get all, like, super nutty after the fact with the MoGraph selection tags.
So let's go ahead and get this to where it's just, like, a few big chunks.
One way we can actually do that is by using a fall-off object.
And I want you to be a box. I want you to get bigger.
Let's turn off this top layer once since it's going to town.
So I want to have...I want to make my base just really thick.
So wherever I move this fall-off object, that's where I'm going to get just one
big, glued-together cell structure that's working together with the rest of it.
So, now if I go to this object and create a mograph Selection and just
select...actually, before I do that, I don't like... I want to have this one
have just a bit more in our point amount. So I'm increasing the amount of shatter
pieces on the top, but with the fall-off, I'm locking us away in where they can
actually...where they can occur lower. [Inaudible] on time. We're okay on time,
because I really... We wouldn't have had time, but we did.
All right, so, MoGraph Selection, move this down again, MoGraph Selection,
just up here. Enable this for our object, just happened in the MoGraph Selection,
and you can layer the way your Voronoi Fractures are set up just in this same
flow. But just make sure the connector is always at the top, so the connector
iterates all the way down. I haven't got it to work correctly in a tiered
structure, but I'm just maybe doing something wrong. It's highly likely.
Also, if I have done something wrong, feel free to tell me.
So I'll go ahead and hit Play. Rigid-body dynamics. I need to make a selection right
here that ignores...oh, no. I need to make a selection on this one that ignores
this one, so I have to have a rigid body tag, MoGraph selection.
Again, this is so I lock my... I knew that was going to happen again.
Good thing I just hit Invert. So now it's only hitting the top.
They have a connector. So, imagine you take a simulation like this,
where you're creating