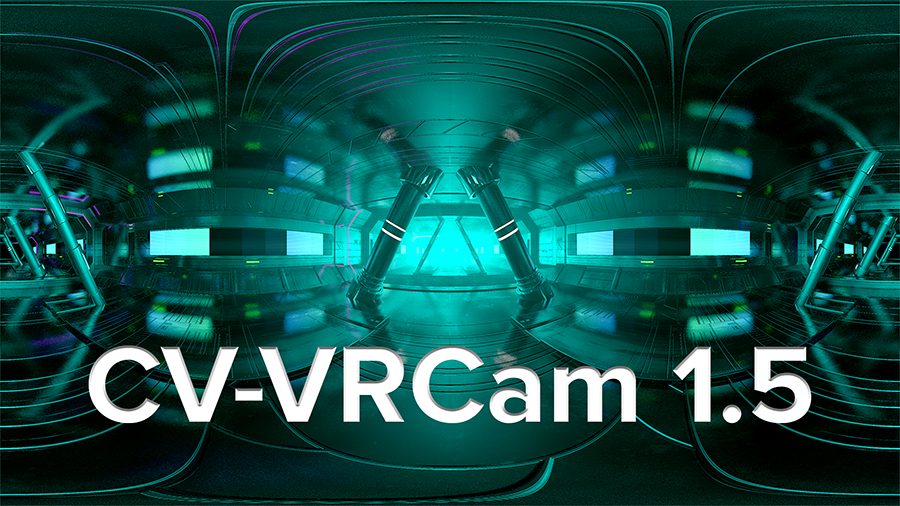
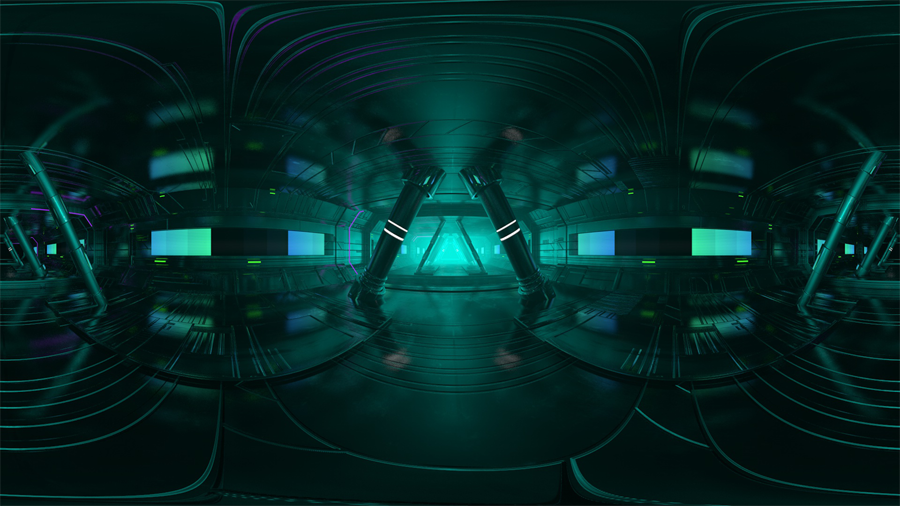
Siggraph 2017 Rewind - Ethan Shaftel: VR in C4D - Making Extravaganza
Share this video
In this live presentation, Filmmaker Ethan Shaftel shares his process for making the VR Film “Extravaganza”. The film combines live action elements (starring Paul Sheer) with an all-virtual puppet show rendered in Cinema 4D using the CV-VRCam plugin. Shaftel begins with a discussion of VR Films and headsets. He moves onto sharing how you can render simple equirectangular images using the Bake Texture tag. After that he discusses the simpler CV-VR Cam workflow. He closes his presentation with some tips on how to save time on renders using a matte box.
Unfortunately, we encountered some technical issues with our demonstration computer & recording setup - so sections of the live presentation did not make it into the final edit.
| 00:00 | Introduction |
|---|---|
| 00:47 | "Extravaganza" VR Film Trailer |
| 01:45 | Cinematic VR |
| 02:47 | 360 Video Cameras |
| 06:13 | VR Headsets |
| 06:40 | Rendering 360 Video By Baking a Reflective Sphere |
| 10:31 | Previewing 360 Renders with GoPro VR Player |
| 11:23 | CV-VR Cam |
| 17:59 | Using Cinema 4D For 360 Previsualization |
| 19:13 | First Person Point of View |
| 21:03 | CV-VR Cam Quickstart |
| 25:32 | Working in "Director View" |
| 27:07 | What Actually Needs to be 3D? |
| 31:03 | Super Self-Aiming VR Matte Box |
| 36:00 | The Final Render |
| 37:07 | Conclusion |
Transcript
- [Ethan] My name is Ethan Sheftel. I'm a filmmaker. I come from a...
I've worked in a lot of different mediums, from feature film to short film,
music video, and then, for a long time, video content for screens and big pop
concerts or other special occasions. And partially because of that special element
in projects like that, when VR started to come about about this wave of VR started
to come back about two years ago, I thought it was a great fit for me.
So I made a project that was done largely in Cinema 4D called Extravaganza.
It's a mix of animation and live action, and we were lucky-enough to get into the
Tribeca Film Festival this year and premiere in April.
So I'm going to start by
showing you the trailer to that and then we'll talk a little bit more.
- [puppets] Welcome, stranger!
♪ [music] ♪
- [cowboy puppet] Telly ho!
- Extravaganza is a satire. So that was a filmmic trailer of it.
Obviously that wasn't VR, that wasn't 360 video, but it's a 360 video cinema
experience. You put the headset on and the viewer becomes
a puppet in this sort of crazy puppet show.
And there are some satirical elements, a lot of the puppet show is
offensive in some way, but you're trapped in it. So that's the movie.
And what I want to talk to you today about is go over a couple of VR basics using
just some simple concepts because I think it really helps in doing CG to understand
a little bit how the analogy in physical reality and how real cameras work and that
definitely applies to doing VR in C4D.
So I'm just going to talk about some VR basics and some of the tools I used
for Extravaganza with my animation partner Frankston Genie,
and then some of the tips and hacks that we developed and sort of discovered
through trial and error using the VR tools and Cinema 4D on this project.
So to start, when I say "cinematic VR" I'm really saying "360 video."
I'm using those terms interchangeably. And so one way to start if you're interested
in VR, of course, an obvious step is to get a little 360 camera like this.
This is a Theta, there's others available. Samsung makes a great one.
And the reason I show you this is because, like I said, it's helpful to understand
physical cameras before you jump into C4D and use their special camera tools.
So the key thing for all these 360 cameras is there's more than one lens shooting in
different directions. So these types of cameras have two. You can see there's two
lenses, one on either side, shooting 180 degree fisheyes. You might have seen
pictures of some of the bigger camera arrays, 16 GoPros in a circle or six or
eight red camera shooting in all the directions.
So the key is, is that it's shooting in more than one direction
and it's stitching together that material to create a sphere.
So I shadow the clip yesterday with this camera
here at the booth.
So the raw camera, it comes out like this. It looks just how you'd expect from seeing
the camera, these two 180 spheres shooting and they're not combined at all.
So this is the raw data off of this type of camera.
And when you stitch it together using software
oftentimes inconcluded with the camera, you get something that looks
like this. So I'm still looking at this material flat. And I'll press Play here.
So what it really is is just like wallpaper. It doesn't make any sense when
it's flat, but you can imagine when it's wrapped into a sphere and you're inside
that sphere, that's where the immersion occurs. Just like when you look at a
Mercator projection map unwrapped from a globe, there's distortion when it's
unwrapped from the sphere. The distortion up at the top and bottom.
All that up there is very distorted
and obviously the scene line there is going to connect later.
So, still, it doesn't much sense. The data coming out of the camera doesn't really
work until you view it in a spherical viewer. So I'm going to use the GoPro VR
player. It's a free video player,
and put that same file here.
And now it works. I am inside a sphere of video. Now of course because it's on a
desktop, I'm navigating with my mouse looking in different direction and have to
use this to look around and look up. That distortion at the top and bottom is gone.
And what you see is sort of funny looking down is that my hand is sort of missing a
slice. And this is really where the difficulties of physical production in 360
video happen, because in real life,
cameras take up space, unlike in Cinema 4D where
there's no physical limitations. So that's just one of the examples of difficulty
working with 360 cameras is that the camera itself has to be removed from
image. There's a blind spot for these two lenses. And you can see it's done a great
job of it, but it has stitched together those two images, and you can kind of see
where those light flares...The light flare only affected one camera and not the
other. You're seeing that line there where it gets cut-off. So that's the stitch line
between those two lenses. So it's cool on a desktop to look at 360 video.
It's even cooler when you use a headset. Any type of thing that's going to strapped
to your face and instead of using a mouse, follow your head movements.
So a head monitor display so that the video is truly all around you,
and that's the powerful part of VR in general
and cinematic VR specifically is being inside of the action.
Okay. So those are some basic concepts. So now let's jump into Cinema 4D.
What I'm going to show you first, before we talk about
the spherical camera tools in C4D,
I want to talk about just... This isn't really a workflow.
It's kind of just an experiment. So this is a photograph here that I pulled from
the internet of a mirrored ball in a garden, a photograph of it.
Now, that equi-rectangular, and I should had defined that before,
but that unwrapped spherical video that I was showing you from the Theta camera,
that format is called "equi-rectangular format". That might look familiar to you
if you've use Cinema 4D because that's the format for HDRIs, images that are used for
sky boxes or reflection maps. And oftentimes they're generated by actually
photographing a mirrored ball.
In fact, that was how they were generated for a long time.
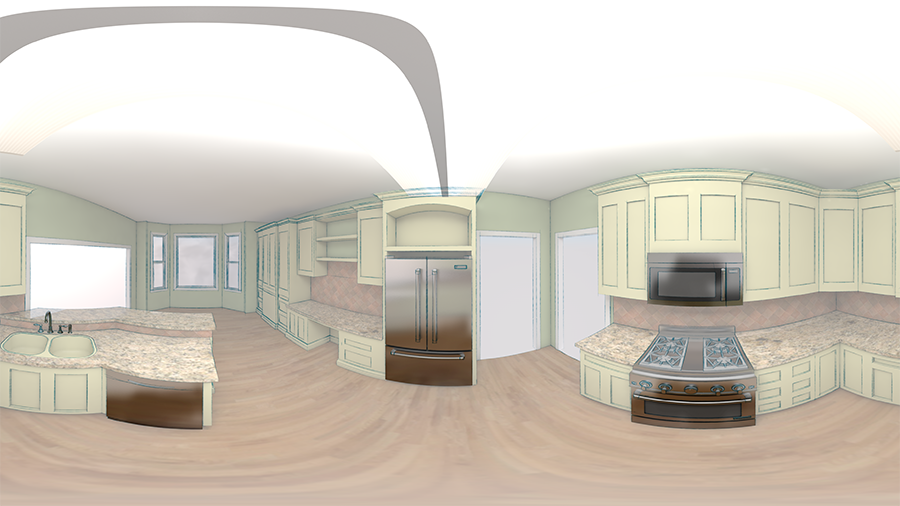
So, talking about being in Cinema 4D, here is a little version of Extravaganza,
sort of a cut-down version of the file that we can play in without getting too
bogged down. And I'll talk more about it specifically in a little bit,
but first this is our experiment. So I've build this animation,
I have characters moving, whatever, I could render out
from standard cameras from Cinema 4D of course,
sort of like how the trailer was a standard filmic trailer.
We created that by putting virtual cameras in Cinema 4D and shooting our animation.
But what I really want to do is generate equi-rectangular image that I can put on a
headset. So to do that, first,
I'm going to generate a mirrored ball just like the photo I showed you.
So I'm going to make this sphere a little smaller,
and I'm going to make it reflective
so that it reflects on its surface everything around it.
Let's see where I place that there.
Okay. That's pretty good. So I'm going to make a...I already have a mirror
there. I wonder if that's what I need. Yeah. So this is just a mirrored
reflection, a mirrored material here that only has reflection activated and there's
nothing else. I'm going to drag it under my sphere.
And so now, if I were to render a picture like this,
we'd see that it's reflecting everything around it, of course,
but what I want is not any other data except the reflection.
So what I'm going to do is instead of thinking about rendering I am going to
bake the texture, bake the reflection that's currently on that sphere using a
bake tag. So I add a bake texture tag, and options come up here in this window.
I'm going to make it similar to the dimensions of the Theta camera.
It's about 2,000 by 1,000 equi-rectangular.
I'm going to change it to a PNG.
I'm going to activate and Enable Only Reflection because I don't really want any
other information about this. I want it to be just a pure mirror.
And I'm going to set up a Render Folder here
on the...Oh, those are my old renders. We'll say New.
Cool. So that's set up to bake this texture which is generated sort of as if
it was a render. I click Bake. Okay, there it goes.
So now what Cinema has done is taking everything that's reflecting in that
sphere and created a clip for it or created an image. And this is my baked
reflection. So that's a functionality that's been in Cinema for a long time,
but you recognize it's doing the exact same thing as...It's creating the exact
same equi-rectangular image as the Theta camera. And in fact, I can open that with
no plugins or any sort of special VR tools.
I can use that baked reflection as a
VR image, and I can open it on a headset, I can open it on a GoPro player.
So this is exactly how we started experimenting with VR early on, opening
our projects that were already in Cinema 4D, if animation already existed or
quickly mocking up scene, throwing in a sphere, baking that texture and using that
as a camera. And a year ago I came to C-graph to ask specifically the people of
the Maxine booth about their VR tools and that's what we started using from then on
because there's so much more functionality.
Okay. So for release 17 and 18, there's a plugin from Cineversity called CV-VR
cam, and it's worth noting that this is now no longer a plugin solution,
it's built-in to R19 which is coming out soon. It was already announced.
Very similar tool, it's organized a little bit differently in R19,
but you can use CV-VR cam now through your Cineversity subscription.
Okay. So let's go back into the Extravaganza file.
I'll get rid of my sphere,
and instead I'm going to open my render. So let's say,
again, I have my animation a set or maybe a preview of something setup.
And I've got a bunch of stuff in here
that I'm going to ignore. Let's see.
So I go to Plugins and find my CV-VR cam. There's only two options in
CV-VR cam, Merging the Camera Rig and Creating Your Render Setting.
So first let's merge this camera rig.
So what's just appeared in my scene there
is the CV-VR cam tool.
It's a camera...
It's actually a set of cameras in a null. So let me grab it
and move it more central. Okay. Oops!
Okay.
I'm going to turn off a couple of these so we can see it better.
Okay. So the CV-VR cam
is really a set of cameras, and this is where it's knowing
sort of how the physical cameras work when doing 360 is helpful.
So it's a null, it's a set of cameras that work together in every direction.
So I'm jumping into See Forward, Left, Reverse, Right,
Up, Down. And so the main thing about CV-VR cam is you don't want to mess with
any of those cameras. They're already perfectly tuned together
to generate your equi-rectangular output.
So what I like to do is copy my forward camera, just duplicate it,
and call it "Look Around." So my look around camera is something just for while
working, while animating, while moving around in the space because the look
around camera is sort of a mock-up of what a viewer might see in a headset.
It helps you make decisions about placement and distance and where something
will grab the viewer's attention, etc. So I just use look around as like a scratch
camera to be like, you know, "Okay. This is me.
This is what the experience of being in a headset would be."
Okay. So I have my CV-VR cam,
I'm going to Enable Forward because Look Around
I've moved around while I'm sort of mocking up views.
And if the cameras have changed relative to each other,
it messes up the output. So I want to make sure that I've ignored look around and
I've gone back to my forward camera and that's active. So now I'm going to go to
Plugins again, CV-VR cam, Create Render Settings. Create Render Settings sets
up the backend of the CV-VR cam plugin. So all these top ones were old render
settings I had in this project, but these two that have appeared,
YouTube VR and YouTube 360, are the default settings for CV-VR cam.
And the only difference between the two is YouTube VR is stereoscopic and YouTube 360
is monoscopic. So what I've been showing you thus far from the Theta camera,
from the bake reflection solution, that's a monoscopic render.
So watching in a headset is still very immersive because that is wrapped on the
geometry of a sphere around you in space, that video playing is truly around you.
So it's still immersive, but until you do two eyes and have true stereoscopic 3D,
you're not really experiencing the full power of the immersion.
And that's a limitation of doing a solution like the hack of baking a
spherical reflection, it's you're stuck at monoscopic.
So in my YouTube VR settings here, I'm going to set it up like...
I'm going to Unlock Ratio into 2,000 by 1,000 again.
We'll make it a PNG, and I'll set it up to go to my [inaudible] folder.
Okay. And if I go to my CV-VR cam settings here, these are basically the
different tools you can use. So I have it set to equi-rectangular, though it's not
the only type of projection for stereoscopic or monoscopic cinematic VR.
You can also do a cube where you're actually texturing the walls of the cube
all around, but spherical is what I've always used, so I'll stick with that for
the moment. I'm going to set to Render Stereo both eyes here.
Now, eye separation is a really key decision when you talk about the scale of
the viewer relative to the world. It's the distance between your eyes and so it's
basically the distance of the virtual head
that you're generating inside your animation.
And then Pull Merge here, I've never changed it from default or anything I've
done, but what that does is it removes the stereoscopic effect at the North and South
of this sphere. So if you want it to be stereoscopic in the middle and not at the
top that can help solve problems, various problems. So I'm not going to touch those.
So I have that all set up, and I'm in my CV-VR camera and I'm going to render.
So all that's going...The main thing we'll see that's different here than the
other one is that it's going to have both eyes, left eye over right eye.
Two entirely separate spheres that get delivered
to the correct eye inside the headset.
So when I started experimenting with this stuff what I was mainly doing was
pre-visualization. I was thinking about projects that I would shoot with a live
action camera, but using Cinema 4D to experiment, mock-up a scene,
throw different shapes around, you know, use the content browser
to put in a refrigerator and see what it's like
to shoot from inside that in 360, just anything while I
was developing the ideas in writing the scripts, I was experimenting and playing
because the barrier to entry was so low. I could do it in a software that I was
already comfortable with. And that's a huge thing and it's very powerful in a new
medium because without...You can't just sort of sit down and write a VR script or
write a VR project the way that you can a film because the language of the medium is
so new. I encourage you if it's something you're interested in doing to utilize
Cinema 4D to just preview, just to experiment, just to see what it's like,
how things grab your attention, how motion works, and how scale works in VR,
and it's through that kind of experimentation that the ideas for a
project will come about. So what all that experimentation in play really does is
start to focus your attention on first person point of view because that's
a really central concept to VR.
So it's worth talking a little bit about what you mean by POV in traditional film
is very different than what POV and point of view
very different than what you mean in VR.
In traditional filmmaking, point of view is a soft concept that's created out
of many many choices in a sequence, including camera placement,
editing, how much time you spend on your protagonist. Even the writing of
traditional film is all based around getting the audience in the head space of
the protagonist in the beginning of the movie so that later on every scene is seen
through their POV even though maybe only a few shots will ever be literally through
their eyes or where they actually are. So point of view in VR is very different
though, it's not a construct of many choices, it's very literally camera
placement. That's the power of virtual reality. Put on a headset,
you are located in space in some other reality. You have a relationship to the
space around you and the characters around you, and that's the primary,
in the hierarchy of your experience, that's the first thing you notice,
and afterwards you start to see what other actors might be doing
in that space or what else is going on in the action.
So something that's very difficult to do with 360 camera technology is first person
point of view. The camera rigs for that are,
you know, GoPro is all around someone's head,
or a short person with a pole and a 360 camera. It's very difficult to get an
embodied point of view with physical cameras. But Cinema 4D, because of the
lack of real physics because it's open world...That still hasn't rendered.
Maybe I'll do it really quickly here again in a new environment.
Okay. Plugin, CV-VR cam, Merge Camera Rig. So I've got my camera rig here.
You can see it there.
And I throw some material into my scene.
I'll put a floor in there.
And maybe because we started talking about first person point of view,
I'll throw a figure in here and I'll make him
6 feet.
And I'll put a couple more objects in,
and I'll make my look-around camera tool here with a duplicated forward.
So I can look around. Okay.
So in cinema, doing an embodied first person point of view of a character
is sort of excitingly simple here.
So first I'm going to put in another figure.
I'm going to also make him 6 feet.
And I'm going to put my CV-VR cam right where his eyes should be.
It actually looks pretty good.
And then I'm just going to erase his head.
I'll jump into my look-around camera,
and boom. Actually I'm backwards. Let me get rid of that.
Move him 180.
Jump in to look-around and there I have a first person point of view.
I'll go to my render settings and let's shoot out a render here in stereoscopic.
Oh. And so now
to create render settings you'll see that those default shows up,
I'm going to use YouTube VR.
I'm going to change it to... Now, 2,000 by 1,000 is not very high res for this at
all, I'm just using it for time reasons.
The Extravaganza's main render ended up being 5,000 by 2,500
for each eye, so the whole render itself was 5,000 by 5,000.
And that's the kind of size you need. I mean, that size is actually bigger than
what currently play on most headsets, but you need to start being in 4k to have
a big enough area of the sphere
so we're only looking at a small portion at a time to look good.
CV-VR cam is set up
and Just PNG
into here, a VR Cam.
And then I'll render. Now, it just plays through it.
So I have my left eye on top of my right eye. You can see there's entirely
separate sphere. Now, if I open it on my desktop in order to work with it in my
workflow, I can only look at one eye at a time, of course, but I put it on a free
player for really any headset. So I just change my preferences to look at only one
of the eyes. And there I am.
So I told you about the look-around camera being useful
for workflow or while in process. Another thing that was really useful for
Extravaganza was a view I called "the director view" because it's sort of like
you're the director or a viewer of the puppet show itself. With those 5k by 5k
renders we spent about 10 days on 10 computers rendering a 6-minute movie.
So you can imagine you don't want to do that very frequently, so actually while
working, while animating, it became much more useful to render some non-360 views
of the project to assess and get timing even do some sound work to it.
So we would render, and it's going to bog down a little if I play here,
but I would render this director view of the puppet show itself and the look-around
camera view so that I can put them in Premiere sort of side by side,
we could assess how things are working and work on the project without stopping and
doing a full 360 render. So we only did a full render about twice.
Another interesting technique here.
So aside from the 360 camera itself I do want to show you
another aspect of this project, which was,
we wanted to avoid using 360 cameras
because of the limitations that I explained with this
project. We didn't want to bite off more than we could chew, but we also wanted to
still use live-action footage and real human faces as a component of it,
and we got a couple of great actors, Paul Scheer and John Gemberling, to be the live
action component. Everything outside of this puppet show is live action.
So we were able to shoot that without a 360 camera, with a traditional red camera
because it's never very big in your field of view, it's always limited to outside
that window. So, yeah, we wanted the live-action footage
to fully be a part of the CG world
and react to the lights and really feel very present.
So if I go back to a little bit earlier in the project here.
So I'll jump into my look-around camera, and actually that's a different camera,
looking out of my master camera here. So that's the position you're in as a puppet
and towards the beginning before Paul has put the mask to his face.
Early on, you're looking outside of that window
into real life when the headset's in a box
and then sitting on the desk, and the two of them are standing there
discussing. And so that was a plain of footage. I can help you see it by turning
off that mask area a little bit. So that's a plain of footage.
You can see the margins there,
floating outside in space far enough away so it
moves correctly in parallax as you move on this mechanized stage,
but so far away that the fact that it's not true 3D is not apparent.
So obviously Paul's body doesn't move in parallax relative to the wall behind him
or the other objects. It's just a flat screen playing video out there.
But that's something you find out pretty fast with doing VR in Stereoscopic is that
the 3D effect only really matters when it's close to you.
You know, you go 10 or 15 feet away from the viewer, away from the camera
that there's no real difference in 3D.
3D is really effective close. So we designed this whole project to have a lot
of movement, a lot of action near the viewer, and then it was less important
further away. Like for instance getting away with using non-3D footage in this 3D
world. However, a couple of minutes into the movie, Paul picks up the mask and puts
it on, so his face comes up into our world and joins it fully.
So that's, if I jump to right where that happens.
So remember I removed the mask, so we're seeing more than you can normally see in
the movie. If I frame through it, you can see geometry has suddenly appeared in his
face. So we've animated that video forward, and, again, I'm going forward
now. So geometry suddenly shows up.
And as he gets closer and closer, it's warping into a face shape.
So that's footage projected on a 3D shape that resembles his face.
And if I go give you side view here.
You can see that that footage
is on a shape that's very much like his face. If I turn on the mask
again we can see that.
There we go.
At that point, our lights take over and his face is fully part of
our 3D world, you're getting corrects parallax on his nose and on his eyebrows,
and the fall off is colored by our stage lights and really part of our world for
the rest of the experience as we move around the stage, he's very much there,
both live action and CG in a way.
So, along the way with doing this, I mentioned the super long render times to
generate our CV-VR cam material. So after spending 10 days rendering something, if
you notice a design change or some flaw, there's some other element you want to
add to the scene, it becomes pretty honerous to decide, "Oh, we'll make that
change and then render again." And yet it's very difficult with...
Extravaganza is one long unbroken shot. So the idea of changing anything in that
room, for instance, we changed the design of the drums over there,
means that it affects every single frame or nearly every single frame.
So we developed this sort of tool that we call the Super Self Aiming VR Matte Box
that is a shape that goes around the CV-VR cam and animates in order to isolate at a
particular element, especially creating a camera around the camera,
and that became really useful. We used that a lot. So I'm going to
show you how we set that up here.
So I'm going back in this project for a second.
So we have our CV-VR cam on our guy here.
So I'm going to make a cube.
And put that cube
around our camera. Just a little bit bigger than the CV-VR cam itself.
Now, that cage, that green cage, that's an indicator,
it's sort of like a safe zone. If something comes within that zone,
the camera has a harder time resolving that. And so you can change that zone by
changing the scale of the head itself. basically, this is between your eyes.
So that represents almost the size of this virtual head.
So I've put a cube around my virtual head.
And then, let's see. That's fine. Okay. That's the blue side.
Then I select one of these panes.
I'm going to extrude Inner and create a aperture and then delete it.
So now we have a hole. And I'm going to turn. I'm going to make my figure here
invisible so he's out of it. So now that box is around our camera,
So I'm going to make a material here
that's totally black. I'm going to turn off everything,
reflection and everything, except luminance, and make the luminance black.
So it's a totally matte black. If I jump into my forward camera.
Oh, I haven't put it on my cube yet. Put that material on my cube,
I look at the forward area of my CV-VR cam. I am looking out the aperture of this
black box outside. So now, how to make itself aiming? I'll back out here.
Let's put in a cone,
Character Tags, Character Constraints,
Enable aim,
under Aim I'm going to take the new cone and put it as a target.
So it's already moved to look at that cone. So that basically makes the aperture
follow my cone anywhere it goes.
So let's earlier part of my render I'm going to jump into my CV-VR cam.
The cone...
I see that.
I'll move it a little further away.
So it's aiming at my cone. I'm sort of confused
of why I can still see the bottom of the cone.
But, regardless, the aperture was going to remain always pointing the cone,
so no matter where my camera or that object changes in space, the Matte Box
is going to keep from rendering all that other data from my scene.
So we use that a lot in Extravaganza
to do little design changes in the world around that camera
or to add elements. So for instance we used it to change the design
of the drums, for instance, and several other things that we could isolate it down
to a very small region and then render through our 10-days of render to just do
that one design change was half a day.
And then we would layer that up in compositing.
So the final render for Extravaganza looks sort of like this.
I mean, this is what the final render looks like. Left eye over right,
six and a half minutes long. If I open it up on the GoPro VR player,
you can see that it's all one long shot because part of a really interesting
element of VR that needs a lot of work, one reason to really encourage you to
start playing around in Cinema 4D is editorial or transitions between shorts is
something that is unique in VR, it's very different than in traditional cinema,
and there's different ways to approach. In Extravaganza we made the decision that is
one long shot. You are embodied in this puppet, you move around the stage with the
mechanism of the stage, and your own character changes when it pulls you into
the floor and so yanking you into the floor of a few frames are coming back up
serves as a sort of scene change, but really it was mechanized things changing
around you. But one thing that we've been playing a lot with is making really
specific unique VR transitions that are not limited to doing one-long shot.
So that's Extravaganza. If you want more information about Extravaganza, you can go
to extravaganza.film. Now, this is going to be released on a VR channel app that's
across all platforms in September. And so if you have a Vibe, if you have a Rift,
or Samsung Gear, all those things should work. And so more information about that
release on extravaganza.film. My name is Ethan Sheftel,
and you can find more about me at ethansheftel.com. And thank you very much.