NAB 2016 Rewind - Graham Johnson: Advanced Scientific Visualization with C4D
Share this video
Graham Johnson of the Allen Institute for Cell Science, UCSF, and Vessel Studios demonstrates the many ways molecular data can be visualized in Cinema 4D with the help of the Embedded Python Molecular Viewer (ePMV). Graham shows how molecular dynamics can be achieved, and how DNA can be visualized. Using ePMV’s live connection to the Protien Data Bank, Graham loads the molecular structure for the Zika virus, and shows how Cinema 4D’s sculpting tools can be used to create a low-poly representation of the virus. Finally, Graham simulates a walking molecule using Cinema 4D’s Character Object and Cmotion tool.
| 10:21 | ePMV Overview |
|---|---|
| 16:29 | Molecular Dynamics in ePMV |
| 19:34 | Constructing DNA with ePMV |
| 23:16 | Visualize the Zika Virus |
| 31:23 | Walking Molecule using Cmotion |
Recorded Live from NAB 2016 in Las Vegas.
Transcript
- [presenter] Well, all right, without further ado, we've got Graham Johnson.
- [Graham Johnson] So I'm also a medical illustrator. If any of you saw Thomas'
talk previously, we work together. I am the scientific director of The Vessel
Team. And I'm going to describe a little bit about our unusual background. Hi Anne.
Where I went to school to get a Master's Degree in medical illustration, and these
are images from my work at Johns Hopkins back in the mid '90s. At that time, we
were still using traditional media. So these are mixed media representations of
surgical illustrations, where we actually got to go into the surgical operating room
to sketch over a period of months to create these teaching pieces for residents
to learn how to do these particular surgeries. During my thesis, I got into 3D
by reading lots of books, and I built a plastic frog dissection kit so
I had early exposure to 3D printing, which
was a lot of fun. And I started using one of the first desktop
consumer level packages available on a Mac called Strata StudioPro. It's a beautiful
program, very elegant, but as it started to add functionality it became less and
less stable in the late '90s. So I switched to Cinema 4D around 1999. It was
incredibly easy to use and to switch too and very stable. And those were all key
things in my workflow. Since that time, I've gone back to get a PhD in biophysics,
and my main project was to build packing software that enables us to take a lot of
small objects and pack them into volumes while obeying particular constraints. And
the main reason for doing that biologically was to take this to an
extreme where we could do things like model complex viruses like the human
immunodeficiency virus, HIV, shown on the right. By combining structures of
molecues, the larger surfaces that, those molecules fit into with information from
biochemistry and biophysics to generate these complex models on the right.
And another reason I like to show this is because I've used Cinema 4D not just for
illustration, animation, teaching, etc., but also as a direct data visualization
tool to confirm, validate and do some analysis on our models. I have primarily
used it as a teaching tool. So these are some of the early pieces I did back in the
early '90s up here showing a molecule that pumps these little yellow hydrogen
cubes into the inside surface of this otherwise impenetrable gray barrier here.
And I've done a few animations of proteins walking along surfaces carrying huge
cargos. And they're pretty fascinating because, sorry I've got to turn the sound
off here, because these proteins behave with very mechanical like systems.
So character animation tools available in Cinema 4D really lend themselves to
generating these types of animations. But because you also have access to powerful
simulation tools, both physics simulators as well as Python scripting, you can
generate scientifically accurate visualizations. And then a lot of what we
do is editorial art. So these are generated using a tool we developed called
the embedded Python Molecular Viewer that's primarily what I'm going to
demonstrate today. This was developed by a friend of mine, Ludovic Autin, when I
was in graduate school. And it collects data from available databases of what
these structures actually look like, brings them directly into Cinema 4D so you
can manipulate them using the tools of Cinema 4D. Again, we use the Cinema 4D for
data visualization because when you have features like global illumination, ambient
occlusion you can make much more sense out of the relationship of this little
pink, pie-shaped molecule to this little blue guy than you can if you don't have
those nice lighting effects. So it really enables communication as well
as data visualization. And then of course I've used it in many cases just for
illustrating covers to try and engage audiences to get excited about these
topics. So this is showing a bit of DNA, much more recognizable molecule than the
other lumpy shapes that I've been showing. And another thing exciting about Cinema 4D
that I'll demonstrate, how we can apply this again is the robust physics that
have been available since version 12 several years ago. So a lot of us, when we
got version 12, just wanted to drop things. This was MoDynamics, the
predecessor to Dynamics itself. And that's dropping 4,800 of these very complex
shapes, concave hulls onto a table while they're interacting with one another all
rendered on a simple MacBook Air 2011. Again, what we're going to specialize in
today is demonstrating this tool that we built as a Python adapter to underlying
scientific software that connects Cinema 4D to real scientific engines, so that we
can get accurate data into our system to be able to tell the story more
efficiently, and more effectively and more accurately. I'm going to show you how to
build proteins like the ones I'm blowing up here and how to do some of these
various techniques to them. I'm going to show you how to build things like DNA
quickly and efficently and get all these different stylized representations.
I'm going to show you how to build a virus.
In this case, we're looking at a polio virus, but today we're
going to build a Zika virus. It's a little more topical. And then we'll finish up
by showing you how to use the character animation technologies to build a rig. And
quickly and easily to be able to model a protein walking like this.
So when I did this animation back in 1999 and 2000 this entire thing was
key-framed. Every little time that blue foot bounces there's a key. Every time it
wiggles or rotates there's a key. So when I'm working with my content experts, the
other scientists on this project, and they want a little modification I'd have to
manipulate thousands of keys to be able to get it to do what I want to do. So today
I'll show you how to whip that up in a matter of roughly half an hour to get it
approximately to what we're looking at there, using some of the new tools that
are available. So in order to orient everybody a little bit better to the weird
world we're about to enter of molecules and cells, I want to use this powers of 10
zoom. So we can see these types of things as we zoom into our thumb using our eye,
using magnifying glasses. We can use high school caliber light microscopes to see
tissues, and then we zoom in another power we can see cells. Then to see
inside of cells, we're really hitting the limits of what light microscopes can see,
although there are new techniques that enable that. Then we need electron
microscopes, and then we need things like particle accelerators and synchrotrons to
be able to see the positions of individual atoms relative to one another. So I'm
going to step out into Cinema 4D and we're going to do another powers of 10
zoom. This is just one of the default female structures inside of Cinema 4D
that's available. And she is wearing on her hand a 1 decimeter cube, that's a 10
centimeter cube. We're going to fly in a little bit closer to a centimeter, a
millimeter, 10th of a millimeter, 10th of a 10th of a millimeter, and at this stage
we can see individual cells. We got a red blood cell modeled here at roughly 10
microns across. And this tiny little dot that I have showing
here, this little white dot, I hope you can even see that on your screen. That is
the size of the Zika virus we're going to construct. So you can fit many Zika
viruses inside of that cell, even though they don't go in that particular cell, and
DNA packs inside of the Zika virus in an incredible way. So the atoms are so much
smaller than even the cell, and the virus and the DNA and we'll explain that as we
work through this. So the last thing I want to do here is show you, before we get
to the hard-core molecules, we'll show you some glitzy molecules created by my
colleagues at Vessel. So these are beautiful renderings by Thomas, our
previous speaker, and Calvin who he works with. Here we're looking at a cell. Here
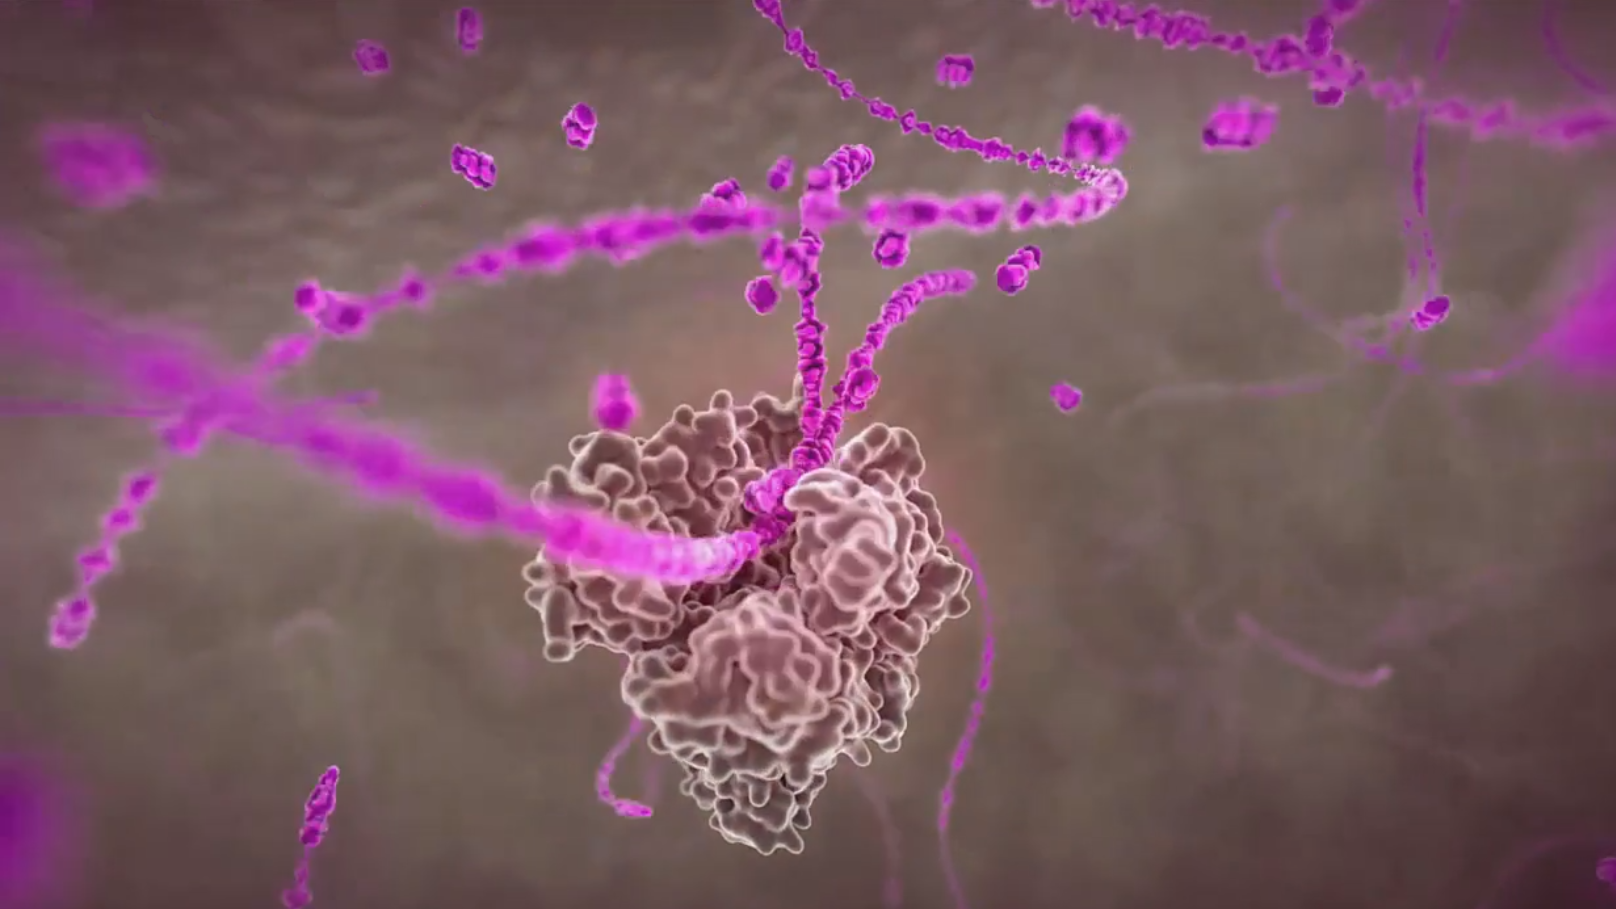
we're looking at DNA inside of a cell. This protein is about to clip that DNA in
half. The protein is the blue thing, the purple stuff is the DNA. This is the
surface of HIV using that system that I developed in my PhD to model that.
That's the top of a cell. These are a bunch of
cells stuck together. We're looking at all their surfaces. Here's a
little abstract composition. Now Thomas is pushing a camera through the inside of the
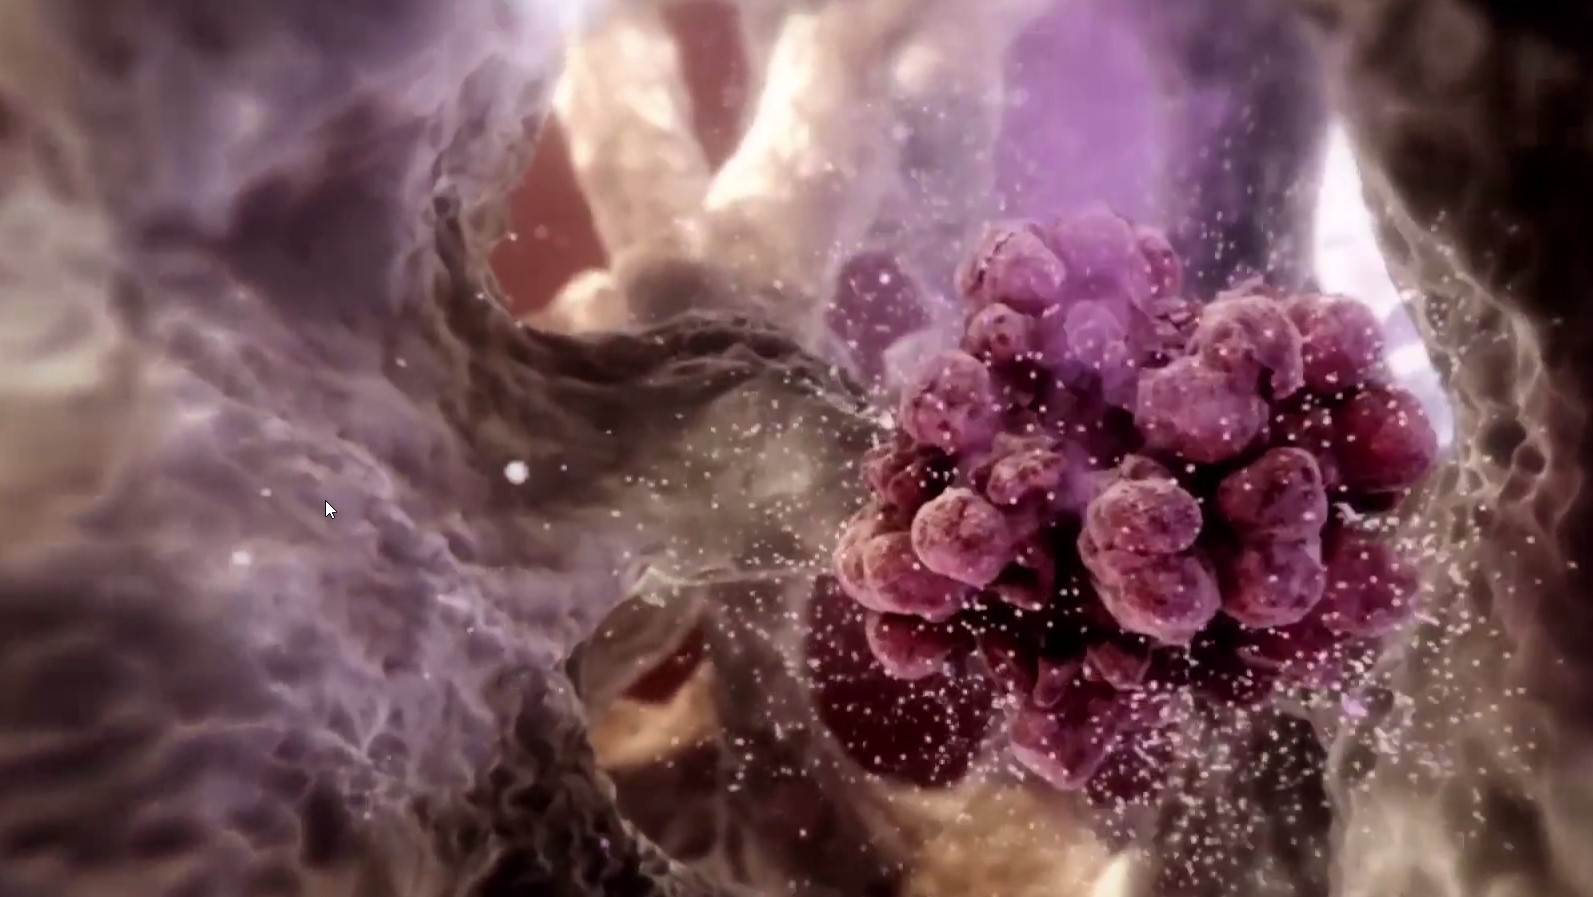
cell to see all of the components that make up the cell. There are a lot of
structures in the cell. This is endoplasmic reticulum inside.
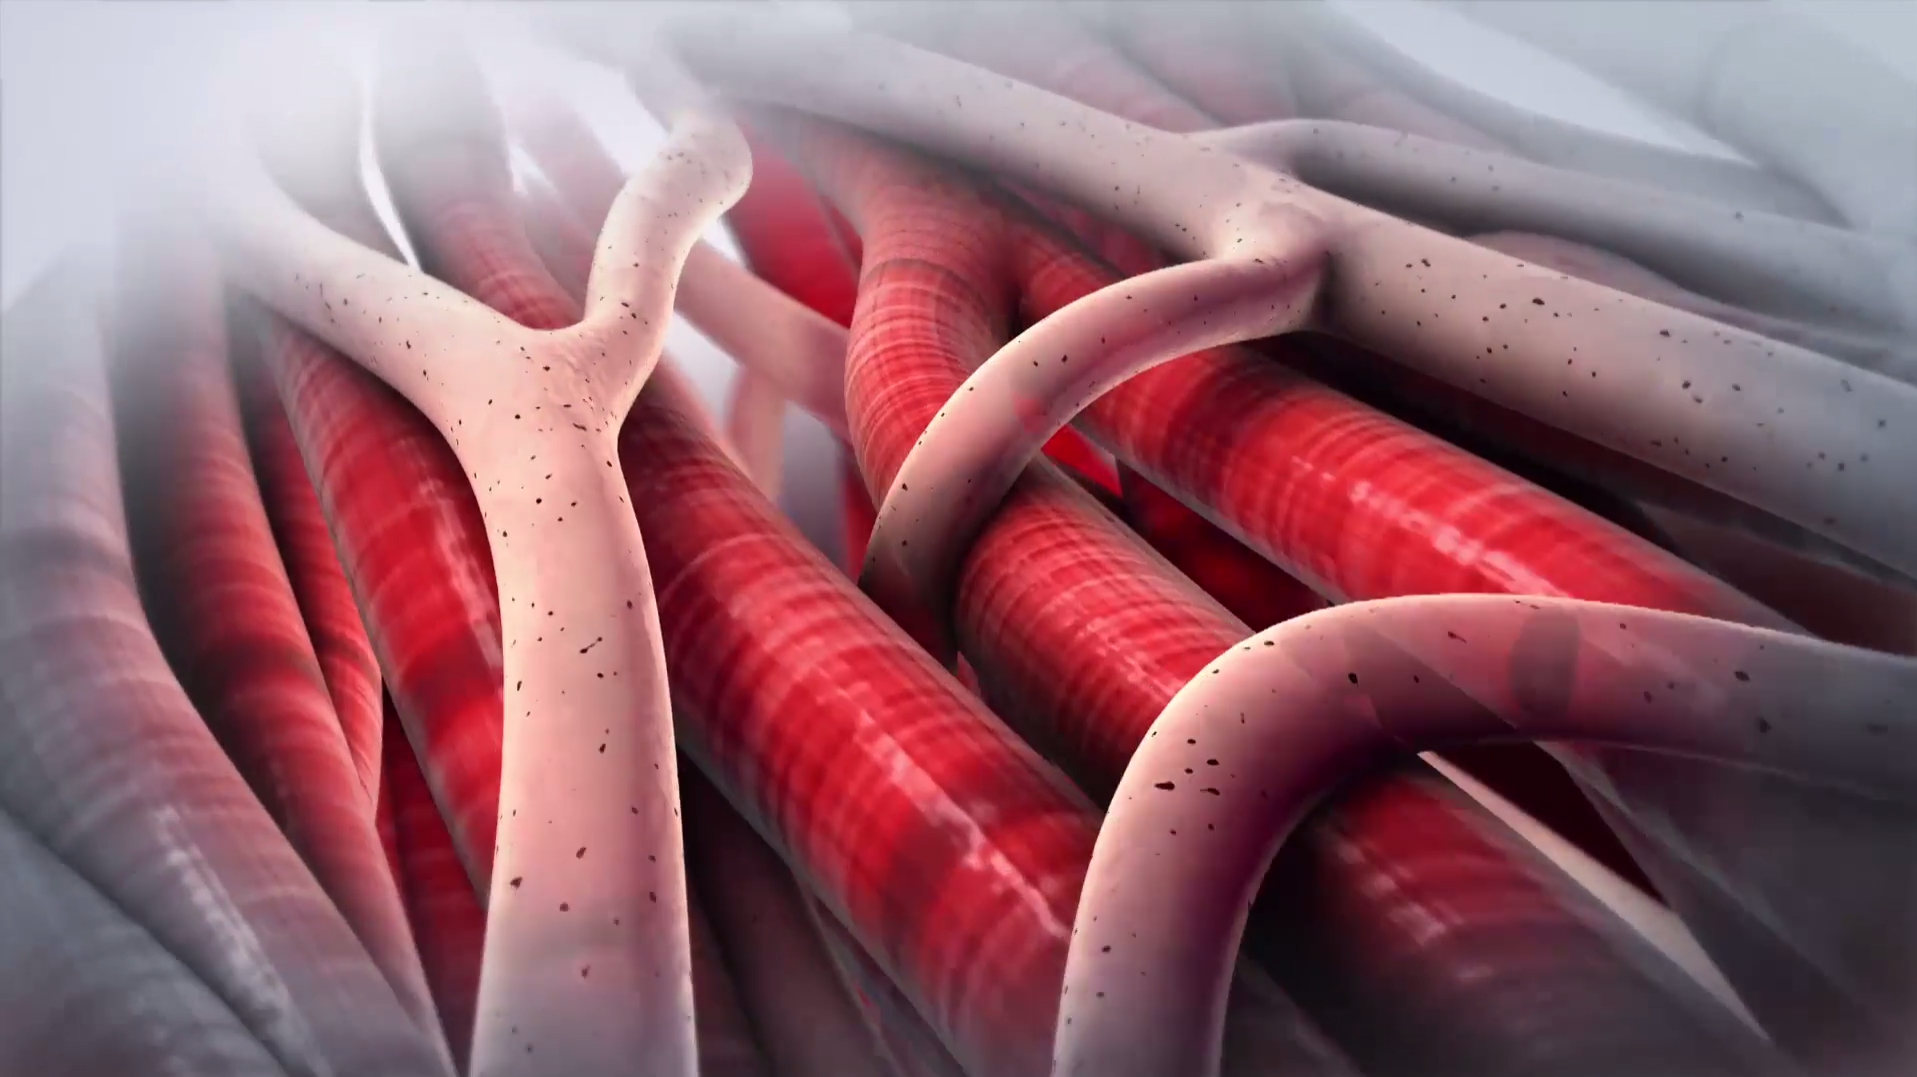
Red blood cells flying through a vessel a very common medical animation to locate
yourself in the body. These are bacteria stuck to the walls. Heart valve pumping
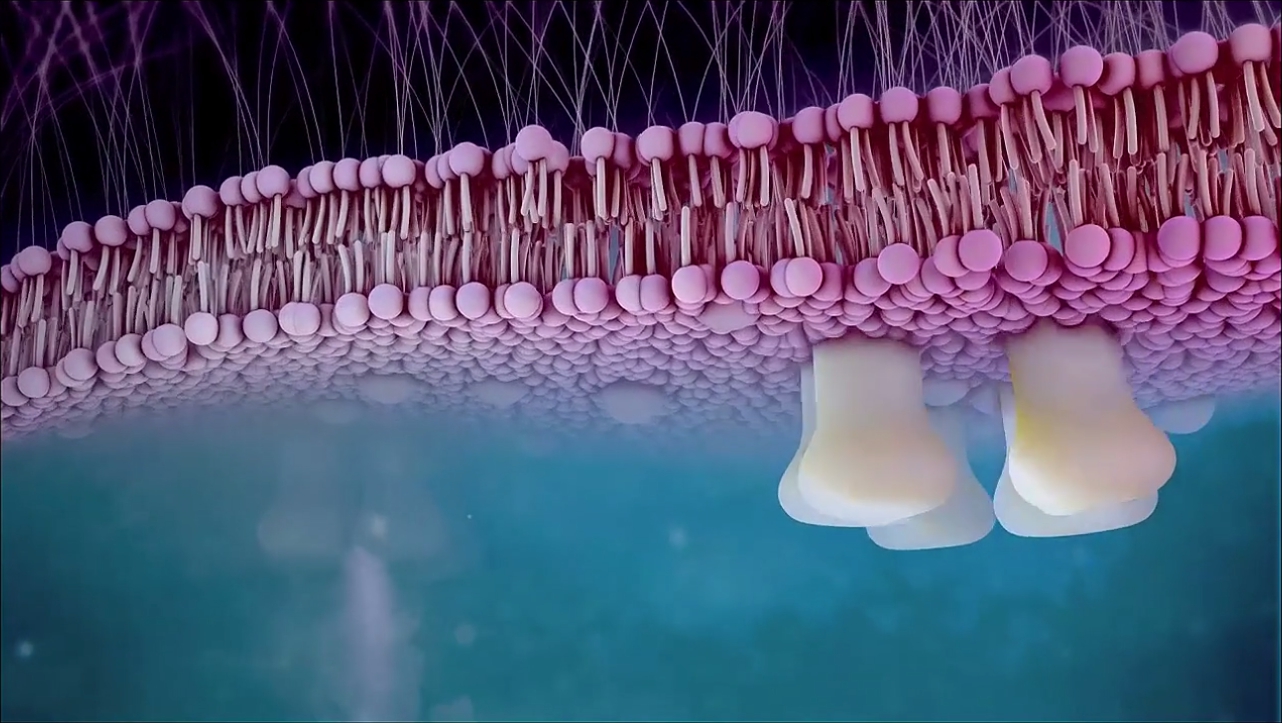
red blood cells, a lipid bilayer with some chemicals being pushed through one of the
proteins in the surface of the bilayer. That's a hip replacement, not cellular or
molecular. And some more views deep inside of the blood vessels looking at red blood
vessels. These are chromosomes. And that's the conclusion. So let's hop in and start
playing with this tool I described to you, the embedded Python Molecular Viewer. So
it is a Python plug-in and I can access it through the plug-ins here. But we've got
so many plug-ins loaded for the demonstration purposes here. I want to
make that more accessible so I'm going to hit "Shift C, ePMV," and then I can drag
this out to create a button so that I can open my plug-in without having to do that
every time. It's a nice quick way of customizing your interface. When I click
to load this, you see our interface floating in this window and it's got a
bunch of buttons and options that we'll walk through. And we tried to make this as
quick and intuitive for people who are not necessarily, have a degree in chemistry or
biology by using names that make a little bit more sense to general audiences. So
the first thing I'm going to do is click "Fetch" and you notice something loads,
and I'd like to hop out really quickly to explain what that something is. So in this
first button, you see this text, "1crn." I clicked "Fetch" and it choose to go to the
Protein Data Bank here. I'm going to show you what that means, hopping out to the
internet. The Protein Data Bank is a publicly accessible database of the tens
of thousands of structures that scientists have figured out the atomic positions of
over the last several decades. There are several ways to search it. So
for example, we could look up Zika and we can find the structures of the Zika virus
that we're going to construct later. I can click on that and, from within here, I can
see this thing in three dimensions or I can load it directly into Cinema 4D. So
the one that we looked at just now, 1crn, is a protein called crambin. And if we
look at what this data format is actually constructed of, it boils down to a bunch
of positions, X, Y, and Z positions for different atoms, nitrogen, alpha-carbon,
carbon, oxygen, etc. Let's get back into Cinema 4D. So now, I can click atoms and I
can see all of the individual atoms that that protein is made up of. I can build a
surface model to cover the protein. I can build a much coarser surface model. So if
you're going to have a lot of these proteins in your scene you don't want
them to be too lumpy and complicated, because then you're scene just looks like
a scribble. So it's more appropriate to show a simplified version of the protein.
And we've got all these interactive parameters and what's going on is my
interface has an adapter that Ludovic built, which is communicating
with a hard-core, scientific molecular
viewer software package down underneath, running on the computer. It's
getting geometry from that and it's rebuilding it into our Cinema 4D interface
right here so that we can manipulate those objects. So next, I'm going to show you
the hierarchy and how you can customize different objects inside of here.
So if I turn our atoms back on, turn our surface off so we can see what's going on.
We take advantage of Cinema 4D and the tools that it has available to rig these
in sensible ways for customization and animation. So for example, if I wanted to
replace my atoms with a unique structure, I'm going to do something very simple here
and just swap a cube in instead of having spheres represent my atoms. So I could go
into the content browser, and I could grab the animated Tyrannosaurus rex, and I
could drop that in instead of the cube and now all my atoms could be little animated
Tyrannosaurus rexes. They could be exploding particle systems. They could be
whatever you want them to be to uniquely describe that structure.
Let me swap that back out.
And then of course we have all the nice, efficient physics that are available
to Cinema 4D. So if I drop a simulation tag, rigid body tag in this case, onto the
object. I'll build a floor to drop our protein onto. I'll put a collider body
onto that floor and when I push "Play" nothing's going to happen. It's going to
fall right through because I need to tell this simulation tag to carry through to
the children. So we can drop the object itself. I still have my ribbons turned on,
I'll turn those off just so they're not confusing. Or we can apply this to all the
children and do something a little more exciting like make the atoms explode.
So just with this simple hierarchy we can do things, we can manipulate things. We
still have a connection to the data, so I can change the coloring system used to
represent these atoms from one that colors each element individually to one that
colors the amino acids, which is a meaningful thing in the chemical make-up
of this structure. And it still respects it because we've been using this
instancing technology to be able to map these colors onto the atoms. So let's take
this a step further and add some real dynamics to a slightly different system.
I'll keep my crossed that this slightly more complicated setup works.
This time I'm going to load a
molecule, zoom in on it so you can see it. And I'm going to load a data set for that
molecule, which is a molecular dynamics simulation
that was calculated on a supercomputer.
I'll try to connect that up to the viewport. So I'm able to see all
7,000 steps of this molecular dynamics simulation. Let me put on a brighter tag
on this so you can see it a little bit better.
Brighter texture. And I can use Cinema 4D
to emulate that, or I can go back to my other setup here. We'll get rid of this
rigid body tag and I can just use the random generator to make those atoms walk
around. So I'm going to put a random effector as a child of all of my atoms on
the same level as all of those atoms. I need to turn off render instances
otherwise they'll stay locked in. And I'll set random to turbulence, synchronized and
indexed on. And when I push "Play" again nothing's going to happen but when I
change my parameter from regular space to object mode, the atoms start flying around
and we need to control that a little bit.
I'm going to switch to the parameter settings and just
knock these down to two by two by two. That turbulence noise space that these are
marching through is a little too large, so we can emulate a very crude molecular
dynamics simulation that's good enough for say educational audiences, especially when
your molecule is this far away. We can put vibration tags on it to give it what's
called Brownian motion, which is Brownian dynamics, which is the natural bouncing
motion that these molecules go through, because they're constantly being collided
by water, and water at this scale is the same size. So again, these are atoms. Many
of these are oxygen atoms. Water is made up of one oxygen with two hydrogens like
Mickey Mouse ears on it. So water at this scale is a very similar size to the
protein that's floating in the water. So let's try one more thing, to construct DNA
quickly and easily. So we built an extension into ePMV. Again, it's a Python
module and it's connected out to several other Python modules. And in this case,
this extension is going to reach out to a web server that's going to allow us to
type in our own sequence of the four magic letters that make up DNA.
It's going to go out to that server, it's going to send back a structure and allow
ePMV to build a representation into the view for us. So I'll just call this
mydna.pdb, because it's going to send back a PDB file. Type in AATTCCGGATGCC,
whatever. I'll replicate that a couple times so we get a slightly longer strand
of DNA. And I'm going to set it to generic, click "Build" and cross our
fingers. And we can zoom in on this. So it's built of a proper strand of DNA and
it's built it with the actual sequence, the specific sequence that we typed in, if
you need that level of accuracy. This still has all of the same features
available to it, so we can see all of the atoms
that are made up by that DNA. Let's try to color it. We can color
it by the bases that were made up of that DNA. And now let's make a slightly
prettier surface representation. If we wanted to make a long strand of this
again we've got too many little lumps, too many highlights and shadows if we were to
try and render a long strand of that. So a nice representation is the surface
representation. Let me turn the atoms off and I'll make a default molecular surface
over it. But when we render this, we can do a little bit better. So we can isolate
the two strands of it. And a nice feature of ePMV again is that it has a direct
connection to Python, which in this case allowed us to add a custom Python script
that you can write in here to manipulate the data. But it also allows you to load
existing Python scripts. And I'm going to load one here called surface-per-chain.
And I can adjust some of the settings here. I'm going to crank this to
0.15, because after some trial and error, I find that one looks really beautiful.
We'll just click execute. Turn off this original one. And then back in our
hierarchy it's generated several different types of structures. I'll turn them off
one by one so you can see what's going on a little bit better. So now, we have two
different strands, one for each piece of DNA. If I put a unique color onto each one
of those, it's a little bit easier to appreciate what's going on.
I should slow down a little bit and drop
these on specific locations so that'll speed up some of
our actions later. I'm going to delete these default colors that are on here. So
we can build two strands and we can even open up a for-loop in here that let's
us build individual objects for each one of the bases. And there's all sorts of
other ways we can customize that, but let's move forward this time and build
that Zika virus I promised. To do this I need to turn off a couple of options in
Cinema 4D to get the molecule to position itself in the proper place. I'll click
"Apply" and "Close." And I know from looking, when we did our test before that,
the Zika virus structure is called 5IRE. And I will click "Fetch."
So looks like it's loading. And this is a
relatively large structure so it's asking the Python engine down below to
construct this large ribbon model of one of the structures. And if you recall, back
at the Protein Data Bank, the structure itself looks much more like a sphere, a
soccer ball. So what we've got right now is just one of these stripy color
combinations and we need to repeat that 60 times to generate that sphere. In Cinema
4D, we're going to use a tool to do that in a relatively efficient manner, which is
called the Biological Unit. So when I paste that in, we get the entire virus
constructed, and again, it still has a live connection to the data here. So if I
turn off the ribbons and instead turn on one of these blobbier surface models.
Let's fatten these up a little bit. We can see the individual components. They're
currently colored by atom. We can choose to color them by chain. And the default
colors in the underlying software are going to be a little alarming when I
render this, but we can go in and fix that. So let's use our surface-per-chain
option again. I'm going to turn off the more expensive calculation of the
molecular surface and I'm going to fatten up the coarse molecular surface by
manipulating a couple of the variables again. You can study these interactively
with the viewer up above up here, and then you can replicate those down into the
Python script to repeat them. I'll click "Execute," and then I need to
just clean up what I've done here, which is to turn off a little bit of the data of
the whole model. So now, we've got individual components for each one of the
major structures of the virus, and we can just use our traditional tools of Cinema
4D to customize that. Let's just make a couple of color changes, keep this one
white. I'm just going to use some primary colors here so
it's relatively easy to see what's going on.
And we'll do just one or two more. Then I'll drop these onto the objects
themselves, because in Cinema 4D the child always overrides the parent. I need to
turn off some of these underlying values, and then I can drop our custom textures on
to the other objects. So we get our own unique color coding. Three of these are
still using their original colors, which is a little bit confusing. And then of
course these are just individual objects, so you can grab a bunch of them,
manipulate them, take a look inside of your virus and construct your DNA deep
inside of there. I should use the rolling instead of trying to slide with my
slippery hand to the right. Okay.
So that quick and easy, you can get a very hot topic, which is a virus that's
just come out and had been a big threat, and generate it accurately and easily.
And you can also customize this, because again, we've got this hierarchical setup
of these repeated objects that are repeated just like panels on a soccer ball
of the hexagons and pentagons to generate the soccer ball. These little
proteins are generated from a
smaller strand of DNA that can just make many, many copies of them so they can
efficiently build lots of those from a relatively small DNA genome or RNA genome
that's packed inside of here. So we can take advantage of that to customize our
virus. For example, we can go and find one of the core objects. I think the easiest
way to do this will be to hide our major objects. I'm going to make a cube really
quickly. I'm going to go to four-panel view, and this is something I just love
about Cinema 4D, which is not available inside of the types of software that are
designed to manipulate molecules directly. Just this CAD feature of being able to see
multiple panels and views and to see your entire scene and all of the components
inside of that scene at one time. So that I can easily generate a base model for a
customized component of my Zika virus using these four views. So now, if I go
into and turn back on our view and drop this in as the base, we've got all of our
cubes being replicated throughout and then of course we can manipulate our cube.
What is my long axis there? That's the Y-axis. We'll give it three. I'm going to
hide the majority of these again. Go into the sculpting interface.
Hit "C," subdivide the object a handful of times.
And I can build quickly and easily a relatively efficient model using
the real data as a starting point underneath. So this can make for much more
efficient rigging of the object, and then we'll just go back to the default scene
here and turn back on our automatically replicated versions of that object. And
we've got a customed version of the components that make that up. So you can
do that quickly and easily to build a much more efficient virus, especially if you
have to animate hundreds of these in your scene, because the default geometry that
the molecular viewer that's lying underneath generates is relatively heavy
weight. So you can either decimate that or build your own thing from scratch like
this. So the last thing I want to show you is that walking molecule. And let's go
back and take a little look at it again. Hopefully this will open up.
So again, I've generated this first version over the winter between 1999 and
2000 using, I think it was R5 at the time. And almost every step of this was
key-framed. It used a technology called "Bones" which later became "Joints." And
all that did was sort of help me keep the thing together and keep it tethered, but
every little pulse, every little rotation of this blue thing has a key-frame
associated it. There's thousands of key-frames just to generate, sorry about
that player button, just to generate this relatively simple looking
walk. So what I want to do right now is show you how to manipulate one of the walk
cycles that are available inside of Cinema 4D to be able to generate this
relatively quickly and easily. So let's take note of this creature as I slide it
back and forth a little bit faster. It has most of the components of a bipedal walk
of a human character. The blue things are like feet. This connection is like an
ankle and the hips are back here, where the legs connect to it, and it has these
big, tall steps that go up and over and out and around. So we want to replicate
that. And I'm going to open up a starting point, which has the model using the
software that I've already demonstrated, shown in the background. And we're just
going to build a character rig directly in front of that. So let's do that as quickly
as possible. Go under the character menu, add a character, click "Root," click
"Backbone" build one of the legs. You got to go back up to spine and build the other
leg. And then if I go to the animate tab I click "Add Walk," click "Play." And that
quickly and easily I've got the basis
for a walking human model or a humanoid type model and we
need to manipulate that to fit our data. But if I turn this one on you can see that
the ankles need to be matched up to these ankles, which are much further apart.
The stride needs to be lengthened, the hips need to be moved down to where the
hips of the molecule are, and we're going to walk through that right now. Pardon me
while I look at my notes a little bit, because I don't want to get stuck in a
hole. But I will add I learned how to do this from watching about 60 minutes worth
of tutorials. So I'm a pretty comfortable Cinema 4D user but I had never used the
character rig before. So that's one my favorite things about this software is
just how quickly, and easily and intuitive the interface is compared to a lot of
other things I've experienced. So let's start manipulating this. We're going to
select the "Character Tag," go to the "Adjust Mode" and select one of the knees.
I need to move that knee down and it helps if I know what the absolute coordinates
are because I sort of know what the molecular coordinates are for my object.
And sorry, one thing I need to do is actually scale this guy up first to make
him a little bit closer to the size of our molecule.
Okay. Then I can select my knee and just using the
move tool...Now if I grab this and move it, you can see it's going to move the
entire foot with it, because the foot is the child of the knee, so that's the
natural setup that you would expect. But if I hold down the number seven key while
I move that object, I can move only the
parent without dragging the children along with them. So
we'll set that about there and then I'll do the same thing to the hips. Set them
there, about 62. You're probably thinking that doesn't match the hips but we're
going to get there in a minute through some more complicated manipulations.
So next, if we go back to the animate tab, we can push "Play" to see how we're doing.
We're getting a little bit closer to the effect that we want with the object. And
the next thing we need to do is lengthen the stride. So if I were to change this,
instead of walking on a static path, I can actually make him walk on a line. If you
recall in that original animation, the blue feet need to step from here all the
way over two steps to the next green guy. So they only touch the intersections of
the white and the green ones. This guy's stride is way too short. I happen to know
from the molecular measurements, but you could do it from trial and error,
that stride is about 160 because each one of these blobs is 80 units wide. So now,
he's doing a pretty good job of reaching the green components, but if we go back
again and look at our animation, I'm sorry I quit out of it. It needs again to reach
over the top as opposed to shuffling along the way
our guy currently is. So we need these big swinging motions
to be incorporated. And to do that we're going to dig down and we're going to
manipulate some of these curves down here. So first thing I need to do is let's keep
our walk just constantly going so we can see how it gets changed and let's slow it
down a little bit. So one of the problems we're experiencing
right now is that it's shuffling and the ankles are reaching and we need to fix
that. So we need to get these swinging oversteps. So if we go under the torso_con
object and select this "Lift (P.Y)," and this will be a little bit easier if you
guys can see it constantly in the same place. What's interesting is in these
graphs we're actually seeing the action of the object itself. So if you watch this
little green line as it moves to the right, the graph gets higher and that
means that the position of the torso, it's on the Y-axis, is also getting higher. So
if you can get that into your head, what that relationship is, then you can
manipulate this graph to get the effect that you want. So in our case, we're
simply going to turn off this bobbing motion of the torso because in our
molecule, the hips don't swing up and down they stay relatively the same compared to
the molecule itself. So I'm just going to set this value to 34 and I'm going to grab
each one of these and move them down to 0. And that should lock our hips out so
they don't swing up and down. Let me fix this. I think my values are a little
different than they should be. Okay. And now we're going to manipulate the feet in
a similar manner. So we'll keep this playing. I want to get the right foot to
swing up and over. I'm going to select its Lift (P.Y) option and set this to about
50. So now, that is the left foot, the red one, and it swings up and over. And
I want to get it to be a little bit more rounded off so it has a circular arch, and
I can do that by just manipulating the points on the curve to create a circular
arch on the curve so that it flies over the top. Thank you. We'll do the same to
the other foot, give this one a little variation and put it at 60, and again give
it a more circular arch to the foot. So then this will make a bit more sense if we
go back to walk the line. We can see it's getting that motion to reach up and over
to stay on to the green molecules that it's supposed to walk along. But if we
look in three dimensions, it's sort of just passing right through itself. The
feet are colliding right through the knees, and
as you recall it actually swings out a bit.
I just love this about the character rig. They keep it relatively simple but they
give you the option to add increasing numbers of parameters. So let's get the
red one to swing out to the side. I can select it. I can select "Shift (PX)" so
the side direction is the X direction. I can say add, it'll add a Shift (PX)
parameter down there, and we'll crank this to about 40. And you're going to see a
pretty bizarre action right now where it's reaching way across and then sliding back
under, and then swinging out and over. And we need to change that and again, if you
can see the shape of this graph over here on the right, we need a simpler graph that
matches our other graph, and we can do that by copying and pasting entire graphs
from one to the other. So now, when I push play, the foot locks in, it swings out at
a nice arch just like we wanted it to and I could do the same one to the blue.
But to speed things up, now let's show you how you can tether your molecule to this.
I'm just going to reach in and grab one of these molecules out of the background
here. We'll get the kinesin-2 guy. We'll make an instance of it. And I need to just
make this a child of the foot, and I'm going to do a couple quick manipulations
to zero some things out here so that I can get a pivot point that's going to be
useful to us later if we were to push this thing a bit further to get some vibrations
onto it. Pop that out. So all I'm doing right now is making a null object that's
going to be a pivot point and then putting the kinesin up there. So let's just
call this kinesin pivot. And now I'm going to expose the sort of underbelly of the
character animation tool which is...This looks incredibly simple, right? We've got
a spine, which is that backbone of the character we can see, and we've got two
legs sticking out of it. But we can see in our view, there's actually ankles, and
knees, and toes and everything. So let's go and take a look at those. And if I go
to display mode, open up managers and go from just components to see the full
hirarchy, I can see all of the code. I can see all of the hierarchical relationships.
I can see all of the different joints. I can see all of the Xpresso tags that are
being used to carry on the relationships from one joint to the other. We don't need
to know any of that. We just need to find out where that foot is and we need to
stick our molecule under it as a child of it. So I believe it's going to be the left
foot. Take a peak at my notes right here. I don't need my notes. We'll just fix it
if doesn't work. We'll grab this and we'll just drag it down to become a child of
that left leg, and then I need to pull all this other stuff back up above it or it
breaks some of the important scripting relationships inside of here. So if
everything goes well now I click "Play," the blue guy will move with our foot and
we're 90% of the way there. So the last thing I want to show you is that we can
get that sophisticated motion of the yellow neck linker. I'll show you
back on the movie, which is that needs to follow the object itself. That needs to
stick to the hips. So wherever the hips go I want that neck linker to stay
tethered to. And the ankle follows the foot every time.
Let's go back to zero so we get into a
comfortable space here. Let's zoom in a little bit on this guy,
and let's just build our own rig and make it part of the default rig that we used
for the character animation. So I'm going to go grab the joint tool. I'm going to
hold down my control key on the Mac. I'm going to click out one, two...
Why didn't that work?
Character, joint tool.
One last try. One, two, three, four, five. Sorry, my
joints are white and they're a little bit hard to see on the yellow, but let's see
if this helps. Time. Okay, thank you. We'll wrap this up shortly. So you can
see the joints that I just built inside of there? And if I select all the joints,
actually we need to break up our mesh here. Remember I made an instance of the
underlying mesh, I'm going to select it, hit the "C key," which is going to expose
the mesh itself. I'm going to select that "Red Chain," shift, select "All the
Joints" control select the "Red Chain." I'll go to character, commands, bind. And
that's going to associate the joints with the mesh, and then I'll just select the
first joint here and say character, commands, create IK chain, which will
create a goal and hopefully I did that right. So it locks in my ankle where I
want it. The goal is being controlled nicely. Again, I'm going to use the
hierarchy that was already built by the person that provided this very nice
default character animation system. I'm going to move
the joints themselves down to follow the leg. So let's find
our leg, let's put it in there. And if I were to push play, these are probably
going to work but they're constantly going to point back where that goal is which as
you can see in the top of my hierarchy is just sitting at the origin like this. So
now, all we need to do is make that goal move along with the hips. Remember I
wanted the red thing to always point to the hips. So let's select that. I happen
to know that this pelvis object is about where our hips are and click "Play."
Fail.
Pelvis, oh, that's too high.
I want something further down towards the base here.
Somehow I lost my guy. Let's just see what happens if we grab him.
Let's do cooking magic.
So I had him in the right place. I did a little bit of Xpresso
scripting to set vibration to increase the higher it gets away from the microtubule
that it's walking along. Again, I only did the first joint here and it obviously
needs a little bit of clean up. But instead of spending four weeks and
thousands of key-frames, we're able to get the base animation in just a few minutes.
So overall, I've just told you what medical illustration is. I've shown you
some tools that we and other people have developed to enable you to gain access to
data, and then what a powerful tool, a full-blown animation package Cinema 4D can
be to be able to use that data to emulate the way molecules work in a
relatively and quick and intuitive manner.