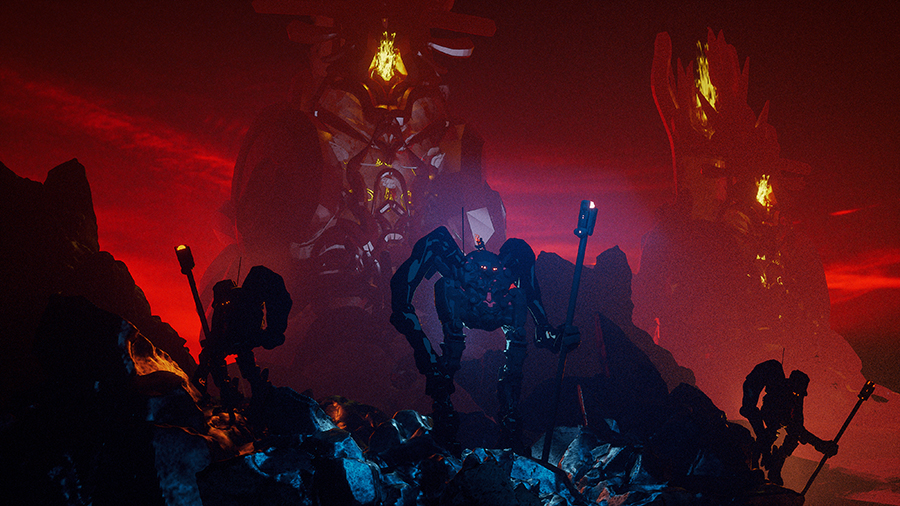
Siggraph 2017 Rewind - Mike Winkelmann: Building a Stylized City in Cinema 4D
Share this video
Mike Winkleman, aka Beeple from www.Beeple-Crap.com, gives us a presentation on how to create a stylized city in Cinema 4D using common modeling tools. Modelling the city buildings, Mike focuses on "hard modeling" and "box modeling" techniques to achieve it's geometric look. Mike then uses some basic MoGraph techniques to turn his collection of buildings into an entire city. Mike then finishes the projecting by showing how to texture the building structures using various gradients, renders a separate pass with Cel Renderer, and then compositing the two render passes together in Photoshop to create a surreal look as seen in some of his dailies.
| 02:10 | Examples of 'Everydays' and the concept behind them |
|---|---|
| 03:05 | Modeling an abstract geometric city starting with a cube and common modeling tools |
| 10:06 | Adding a material while sections of model are selected to save time later |
| 11:01 | Explaining "hard surface" modeling |
| 11:58 | Modeling a building from a Cylinder |
| 16:16 | Using the Line tool to cut edges onto model |
| 19:04 | Adding stylized windows using the MoGraph Cloner |
| 23:20 | Creating a city with building models and MoGraph Cloner |
| 27:42 | Randomizing buildings in city with the Random Effector |
| 28:31 | Scaling city center buildings up with the Plane Effector |
| 30:37 | Texturing the city with gradients |
| 34:34 | Rendering the project and compositing it in Photoshop |
Transcript
Hey, everybody. My name is Mike Winkelmann.
I release work as Beeple. I do kind of a number of different projects,
some of it is sort of... I'm going to set my timer here now. Some of it is,
like, I've been doing everydays for 10 years, I do a bunch of VJ clips,
short films. The professional work I do is sort of concert visuals,
some AR stuff, some VR work and album art, so kind of a number of different areas but
here is a reel with some of the sort of personal projects that I've done.
♪ [music] ♪
Yeah. Thank you. So here's kind of some examples of some of the everydays.
These are all kind of done start to finish in one day and the purpose of this is just
to sort of get better at, you know, at different things. When I started out,
I was doing a drawing every day, I wanted to get better at drawing.
And then the next year after that, I decided that I wanted to try and learn a
3D program, so I did a render every day in Cinema 4D. And since then, I've kind
of done a couple other things but a lot of it has been sort of renders in Cinema 4D
every year. So there's...you know, these are more examples. Gone through a number
of different sort of styles and stuff. Some of them are more abstract and some of
them lately have been a little more sort of illustrative or narrative,
but there's quite a few pictures.
Yeah, so what we're going to be doing today is kind of going through how to make
this sort of abstract kind of geometric city. It's not going to be like Photo
Reel. It's going to be something that has sort of geometric lines,
straight lines, something more kind of abstract and stylized. And I think there's
kind of a number of different uses for this. You could have something that looks
more like a, you know, regular city or sort of a abstract city,
or you could do something that has more of, you know, if you did a top-down view,
you could have it be more of like a greeble type texture.
But we're basically going to be sort of starting from very super simple.
I get a lot of emails from people who are kind of like, "What programs do you use?"
or like kind of, "Really, I've no idea how, you know, this type of images would
be made."
So I'm going to be going over some, like, super basic concepts in terms of,
like, what polygons are and kind of go from there to show how you can sort of
take very simple shapes.
I mean, starting with a cube and sort of come up with something that's a more
complex design. Okay. So if we want to jump right in here, we'll start with a
cube and this is kind of, you know, one single object obviously and it's kind of
made up...3D objects are made up of sort of polygons, points, and lines and they
kind of all sort of work together to make up the object. So from here,
we can kind of take this cube and press C and make it editable.
And the other thing we can do is change the view so that we can see the actual
lines of the object.
And this is going to kind of come in handy because in our final render,
if we look back here, you can see we'll sort of be able to see the lines of what
we're doing. So we're going to kind of keep thinking about the,
like, topology and what the lines of the actual objects are going to look like
because that will be in the final piece. So from here, there's,
you know, a number of different operations that you can do to sort of model and make
this not a cube.
The first thing, obviously, the simplest thing is you can sort of pull on any of
these polygons and this would obviously change it from a short building to kind of
like a taller building. One of the main things you can do is or one of the most
common things is just extrude and you're basically just...if you press M + T,
then you can kind of pull out another face.
And so you see it kind of made a line there and made, like, another polygon on
top of it. So you can kind of do this on any of the faces to just kind of give this
a little more...a little bit more of a interesting shape. And this is how we can
start sort of building out details.
And one of the other things you can do is if you grab one of the lines,
these are the different sort of modes over here: polygon, point,
and line. If you grab one of the lines and you go M + S, you can do a bevel on it.
You could also right click and go to Bevel here. But this is...would kind of sort of
bevel it, I guess. You can also add in more subdivisions here to make it,
like, rounded.
But we don't want to do that in this, we want to keep everything kind of straight,
sort of more 90 degree angles, nothing that has kind of like a rounded edge but
if you were modeling something around it, that's kind of how you do it.
So we're just going to keep this sort of a straight edge here.
And so this is kind of another way that you can go in and add in more details and
sort of just kind of flesh things out.
So one of the other operations is...one of the other most common operations is a
Inner Extrude.
So basically kind of looking at these faces and sort of extruding.
If we do extrude like this, now this is an inner extrude. It kind of made one in the
middle, a smaller one, that you can sort of manipulate. So we can then extrude this
in to make kind of a little window here. Okay, so this is kind of,
you know, we're not going to get too... Maybe we'll add a little more.
This is maybe not quite enough.
So we want to kind of just put in some sort of...fill this out with details just
to kind of give it a little more interest. Okay, this is kind of...
See, there's a lot of little gauches [SP], so right here there's kind of a wonky...
you know, if I do this, it gets real weirded out. So these are sort of the
things you need to kind of keep in mind when you're modeling something.
We're just going to not do that because I don't really know a quick way to fix it.
But you can also do these bevels on, like, points too and that will give a different
sort of look. But this looks like it's about enough sort of detail for one
building. So we're just going to take and call this "Building 1" and then we're just
going to move it out of the way and we're going to start a new building.
And it kind of helps speed things up, not running into problems.
If you sort of start always at 000 when you're, like, modeling something,
it just gets...it's easier if you're bringing in other pieces or if you're
doing, like, symmetry or something like that, it can just save time to just kind
of always be starting from the, like, middle origin point or whatever.
So if we want to just grab another one here.
And then a lot of it is just sort of doing the same operations and kind of making
variations to that. The other thing is, with a lot of these settings,
the Bevel, Extrude, Inner Extrude, there's settings over here that you can sort of
play with to get different results. One of them is the subdivisions here, so we can
kind of turn this up a little bit. And then instead of just making one cut,
it makes, like, a bunch of cuts. And then from here, we can kind of take these and
sort of do make, like, maybe like a row of windows.
So here's another little setting. So if we do extrude on these,
Inner Extrude, it can extrude all of them as sort of a group. Or you can uncheck
this and it will extrude them all sort of on their own. In this case,
I think we probably want them on their own and we can kind of make another little
bump in here. So another thing we can do to sort of save time down the line,
right now we're just modeling but we're eventually going to be applying color to
these and making...you know, trying to make the city look as random as possible.
So one of the things we can do to sort of save us a little time is make a material
here. If you just double-click down here, it makes a material,
and then just dragging onto this while they're selected. That way,
we can kind of just change that out right now. We're not going to worry about it,
just leave it white now and then just change it out later. It just kind of saves
time. You don't have to go ahead and select all those things again.
So then I'm going to just maybe extrude this and do a little bevel. And I'm just
kind of putzing around, I guess. There's not really any right answers here.
Yeah, this is kind of the sort of basis of...it's called hard surface modeling.
It's not sort of...these aren't organic shapes, they're hard surfaces.
So one of the other things we can do to make sure these have, like,
a nice, flat look is delete this Phong tag. It's just on the side here,
there's a number of...they're called tags. They sort of affect the properties of the
object. If we delete these, it gives it a more flat look. Those kind of round it a
little bit, kind of. It's a little complicated but... Yeah, so this is
probably good for this one.
So we'll just move this over. And maybe we'll start with a cylinder for this one.
So it's slightly different. One thing we don't want is this, like,
rounded look, so we're going to go ahead and take the rotation segments.
It's basically how many different segments are around the cylinder,
put it down to maybe like eight. The other thing we need to do after we make this
editable is sort of fuse the top and bottom to the cylinder itself.
Because right now, they're separate pieces. So if you see if you grab this
up, it's not connected. The easy way to do that is just go into point mode, press
CTRL + A to select all of the points, and then just go to Optimize and it will
sort of fuse that, those two pieces together. So now when you move it,
it's kind of part of it. So from here, we can model on this.
And one of the other things that is pretty necessary for modeling like this is being
able to select polygons different ways. One of the most common ways is to use,
like, a Loop Selection where it kind of looks at the polygons and tries to make a
loop around the object. So if you press U + L, it will kind of see that there's a
bunch here and make like a loop and we can kind of show you that in some other stuff
as well.
So like here, instead of going around and selecting all of these, holding down CTRL,
you can just click one of them, go to Loop Selection, and it will see,
okay, this loops all the way around and grab all of them at once.
And then you could sort of bump this in. You can do that same thing for lines as
well. So you could say loop along this, now it selected all of the lines and then
we could do a bevel like this just to give a different look. Oops. Yellow.
So yeah, we're just kind of dialing in details here.
These are kind of... What the?
I don't know how that triangulation happened. We're just going
to roll with it, though. Well, I guess, I mean, we can fix this.
There's ways to fix these things but it doesn't really... So what you're going to
just do is untriangulate. For some reason, these got... I don't really know what I
did, but it got wonky and triangulated all of them.
So you can go and untriangulate these if you wanted to. So there's ways to sort of
fix problems if they arise. So this is kind of, you know, the basic sort of
building blocks of what modeling is. It's just doing this a lot and kind of going in
and tweaking things.
If you wanted to go...you can go into the point mode and then go to,
like, a different view and sort of, you know, grab a bunch of points and say,
"Okay. I didn't really like it like that." Maybe I want this to be a bit higher.
Straight, straight up.
Maybe I want it to be a bit bigger." So there's a lot of different,
you know, kind of operations that you can do to sort of tweak these things.
Let me do "Building 3."
So this one, let's start with a cube again. Just kind of build out more
details. The more...you know, if you're going for a look like this,
the more buildings you have, definitely the more sort of interesting or varied
the piece will be. The other thing you can do if you don't want to,
like, extrude, say we wanted to put a line in this kind of area right here.
One of the biggest things, most common tools to use for modeling is to kind of
cut them or make like a...there's like a knife that you can use to sort of cut
these polygons.
And you can just cut them like this, just cut them straight across and then you've
got sort of two separate pieces now. Or you can do things like this where you...
First, we're going to select all of these, where you can do a sort of cut along a
plane. So if we go to change this to world, now you can see you're cutting kind
of, you know, along that axis or you could change it to this axis...to be able to cut
in like this. And maybe we'll take this...sort of punch this in here,
put a different one on there, so we've got a couple little variation there.
Punch these in here.
Let's do a cut here.
There's kind of different types of modeling for what
you're ultimately going to do. This is kind of called box modeling but we're not
really paying attention to topology in terms of if you wanted to put this in sort
of like a subdivision which sort of would round everything. So if you put something
like this in, it's going to look not really how we want.
So there's sort of different techniques. If you were modeling this to be sort of
smoothed out like that, you wouldn't model this. It's kind of more,
like, dirty modeling kind of something for a little bit quicker sort of workflow.
Yeah, see where we are at with time here. Okay.
So I think maybe we'll do a couple more here.
Kind of punch this in to have like a little sort of roof and we can add other
sort of shapes on top of this to kind of make these a little more interesting as
well.
So one of the things we could do is add in, like, windows as another object.
What we can do there is, say we want to grab another...put another cube in here
and kind of drag this down. And again, these are going to be very stylized
windows. These aren't sort of, you know, photorealistic at all.
They're just kind of getting some shapes down to sort of add detail.
So from here, we could grab and copy this. Hold down CTRL and drag out a bunch of
them. The other thing we could do if we want to very quickly make a bunch of
windows and have them all be uniform sort of with the part is use a cloner and then
put the cube under the cloner and click this fixed clone, we'll keep it sort of in
place where it was. And from here, we can kind of, you know, sort of set as many
different clones as we want and we can also change the width in between them.
And so we could kind of make a row of windows there.
Yeah. So we can, you know, kind of apply a different color to these two and then we
can go back and change these colors. And there's a bunch of different ways that you
can do cloners. One of the other ways is... So maybe we'll save all this.
Group O + G, "Building 5," move this over. So another way we can do this,
we'll take and pull this up, pull this up and then make a row of...
Maybe we'll make this whole thing a bit wider like this, thinner. Actually,
I don't like those points.
Pull these points in a little bit.
So what we can do then is do another cloner, but this
time, we'll do kind of like a grid of windows. So if we do make another
little cube here, pull it down a bit, now pull it down a little more,
and then we can put it in a cloner and switch the type to grid.
So in this case, we don't need multiple ones in sort of the Z-axis,
we're going to get that down, take that down to zero or take that down to one.
And then sort of take these... Actually, we should take it here and then you can
kind of change the size of this by pulling these up and then you can kind of fill
this in with different windows. So these are just some ways to kind of like quickly
fill in a lot of details without having to put in 100 cubes manually.
That's probably not super straight but we're just going to wing it.
Yeah. So I think this is probably about a good enough number of buildings to give us
some variation, so if we O + G. So the next thing we need to do is we kind of...
from here, we're going to clone out the buildings into sort of a grid of...
you know, make the sort of city out of these sort of building blocks that we
built. I'm going to go ahead and save it now. Yeah.
Yeah. So we need to clone these out. "Building 6" and then this is...
I don't know what this is. It's just... Okay.
Wait, what is this? Okay. Yeah, so the cloner.
Before we do that, we need to change and make sure that all of the
sort of axises, axisi of these objects are sort of at the base so that when we add
random sort of heights to them, they'll all sort of scale correctly.
And the way to do that with these ones that don't have multiple objects is to go
SHIFT + C, just learned that little doozy. The reason I just learned that is usually
there's certain things you can kind of put icons up in the...sort of add them to the
user interface and this is one that I use a lot so I have it added to there.
But anyways, axis center, and you basically just move all of these sort of
axis things to the bottom by pressing X or Y in the zero direction.
So then for these with the...because they're sort of groups, we've got to,
like, manually pull these down and it doesn't need to be, like,
perfect but just kind of manually pulling these down to the bottom will save us a
little headache down the line. Okay, so we've got all of our buildings.
From here, we can throw it into a cloner. Let me just grab all these,
put them under the cloner, and then we have our... Oops. Change this to grid
because we're going to kind of make a grid of buildings.
From here, we have our sort of variations. We can kind of up this.
Oops. We don't need any in the Y direction so we could put this to zero.
And from here, we can kind of add in more, sort of feels nice and filled out.
It looks like this one is way too big so it's kind of overpowering, so we're just
going to sort of scale that one down so it's not too obnoxiously huge compared to
the rest of them.
This one, which other one is that? This one? Yeah. Okay. So they're all kind of
roughly the same height that will sort of make...none of them will sort of stand out
too much. And we got a couple Phong tags hanging around here. Actually,
I'm not sure that's going to matter but it's probably best to go delete those.
Anyway, so from here, we can kind of...there's a couple things we can do to
make it more random.
Right now, it's just going through all of the six buildings kind of,
like, in a row, in like a pattern. So from here, we could take and change this to
random and then it will kind of...and you can kind of keep clicking the city until
you find sort of a look that you like. This looks good. Yeah, and that will kind
of sort of randomize the city a bit more. Maybe we'll add a little in that
direction.
The other thing you could do is turn on this render instances,
will kind of speed things up a bit. Maybe let's put in a floor here.
Yeah, so from here, we want to sort of add in more random heights and
sizes to these. So we could take a random effector, put it in here,
and now it's going to do whatever the random effector tells it to do.
So in this instance, we don't want it to be random position, we want it to be
random scale. I'm just going to have it be absolute scale. And so we're going to kind
of play with this till we get something that makes it a bit more random.
So this is kind of good. Now maybe we could jam in a few more.
There we go. Okay. So from here, we want to kind of make sort of the center of the
city be a little more bigger, bigly. So we want to kind of have them sort of ramp up
to the middle there. So the way to do that is to put a plane effector on them.
So if you go to Plane... So we don't want it to move and no, just kind of right now
is affecting all of them and it moved all of them up a little bit.
So we don't want that.
We just want to sort of scale them up in the middle. So what we're going to do is
put this to negative one. Now, again, this is affecting all of them because we
haven't set a fall off. So what we want to do is change this to sphere,
and now, it's just setting them to negative one wherever the sphere is.
So if they're not inside that spehere, they're not going to go to zero.
So if we make this a little bigger, then it will start affecting them and start
crushing them down. So this is, right now, it's doing what we want but it's doing the
opposite of what we want because it's crushing them down inside the sphere.
We want to crush them down outside the sphere so you just change this to invert
and then it will sort of crush them down outside so it gives it more of like a nice
sort of little city center look and kind of falls off.
The other thing you can do is change this...there's different ways to sort of
control how the fall off happens. I usually change this to inverse cubic
because it kind of gives it a slightly more inverse cubic look.
So from here, you can kind of play with, you know, sort of dialing in the look
however you want. But I think this is kind of basically what we're sort of looking at
in terms of a city. So now we are going to add colors to it. So one of the things
that I do or one of the things I use a lot for colors just because it gives sort of a
kind of semi-random look is I found there's a...and I'll post a link to it.
There's a tumblr where somebody programmed it and just spits out random gradients.
Every, like, I don't know if it's 5 minutes, 10 minutes, or something like
that, they have it just spit out a random gradient. And so you can go through this
tumblr and see, like, you know, thousands of random gradients. And it just kind of,
for me, gives me...and then you could just download those just as JPEGS or whatever.
So it just gives...and some of them are sort of like four colors,
some of them are just two-color, but it just kind of gives a lot of,
I don't know, gradients that I never would have used probably.
So I think we're going to put those... Actually, we're going to put these in the
luminous channel.
So if we put in this and then we're just going to apply it. You could see that's
actually...because we already have made some of these materials and then they're
already kind of on the yellow. Need some channel. They're already kind of applied
to the objects. So I'm just kind of randomly picking...I guess we're going to
make kind of a pinkish city.
So then you can just double-click to make more of these. And the more kind of
variation you have, the better this will hopefully look. I'll throw this one in.
Okay. So now we're just kind of randomly applying these to these buildings.
We're not going to get too, you know, caught up. If you want to,
you can sort of dial this in. But we're just going to kind of just something to
get color down. We're not going to worry too much about the fact that these
gradients are...it's abstract, so you can just whatever.
So you could just apply these to all of the different objects and just kind of
drag them on there. The ones that already have tags on them, like materials on them,
you need to drag this into the first, otherwise, it will just overwrite the sort
of windows that you had.
So now, from here, maybe we'll try and go in and make these cloners a different
color.
That's literally the same one. Okay. So from here, one thing we can do to
add a bit of extra variation is just take all of these, copy them again,
and change out the colors. So if we kind of change all of these to different
colors, then we'll have at least a little more variation so you don't see the same
building always looking the same color.
And there's tons of little sort of things that you can do to add more variation but
this should give us a semi-decent amount. Okay. So then we're just going to throw
something on the ground here, maybe something like that. Then we'll drag this
in a little bit. Okay. So from here, we have got the basic sort of city.
Now we kind of need to render it out. And so we're going to kind of render two
different passes and just composite them in Photoshop.
The first one, if we just click Render here, is just going to be straight sort of
color. There's one other thing we need to do. It's kind of complicated so I'm not
going to go into it but we just need to check that box. So yeah,
so let's render that again. So then we can just kind of copy this, this
is sort of the picture viewer where it kind of holds all of your renders so you
can kind of go back and see, look at past renders, kind of compare them.
So then we're just going to take and paste this into Photoshop. And then we're going
to go back and do our other pass that as you could see, this doesn't have the
lines. So the way we're going to go back and put the lines in is there's a number
of different render settings here where you can kind of change the way the final
image will look. And one of the effects you can use is called "Cell Render" which
will take and just draw the outlines of everything.
So you can set it to just do the outlines and then it will kind of give you
something like this or you can set it to do all of the edges and it will give you
kind of all of our sort of detail that we had before. Probably be best if we had the
camera, like, maybe...
So the other thing you could do here is you could just render it without a camera,
but a lot of times, it helps to put in a camera then you kind of sort of save your
place. And these cameras work, you know, for people who are familiar with digital
photography or photography, they work a lot of the same ways in terms of,
like, focal length. You could put in a really exaggerated...
The other thing you need to do is click this then you kind of zoom in to the
camera. A very exaggerated sort of focal length that's going to give it a very wide
shot, wide feel or whatever, or, you know, something that's super going to be a lot
more flat. So there's a number of different settings there. The other thing
we want to do, since we're kind of pointed straight down, is just change this to...
Well, we're going to leave it a little off because I feel like you can kind of see
the edges of the building a bit more if we maybe make it like 85.
Come on, what is this doing? Sorry, negative 85. Okay. So then we can kind of
see a little bit of these details. It's not just straight on, we'll kind of miss
some of the sort of sides of the building, the details that those provide.
Okay, so let's render that again. Now we've got...is this thing...?
Why is this? Come on. Put this back to zero. Okay.
So now we can take and copy this. It's not going to line up with the other one,
obviously, because we've... Okay, what is this doing? Copy, paste.
It's not going to line up with this, we're just going to hit Multiply and you could
see it's off because we changed the camera angle, obviously. I don't know why this is
not deleting.
So yeah, we need to go back and render another copy of this without the Cell
Render on.
Go back in here, and then we'll just drag this under, and now we've got kind of
sort of the look that we're going for in terms of the color as well as the kind of
lines on top of that. And from here, you can add, you know, any sort of post color
correction. I would definitely recommend doing, you know, at least some color
correction in post because it's sort of if you're spending that much time dialing in
the colors in Cinema 4D, you're kind of wasting time because you can very easily
sort of tweak colors in Photoshop here.
So if you get it kind of as close as possible, and then from here,
you can kind of get the other 20%, or 15%, or whatever. Let's see how much time we
got here. So there's a couple other things you can do to sort of change the look of
this. There's different render settings. Obviously, you could change the materials,
or add reflection, or stuff like that.
The other thing you could do is add in... I'll go back to regular render and add in
Ambient Occlusion. It kind of simulates how light interacts with things where it
sees, like, a crease in things, like, kind of...they tend to be darker because it's
sort of the light can't bounce or doesn't bounce or something.
So it basically kind of makes things look, I don't know, darker on the edges,
kind of slightly more realistic, I guess. But it's not obviously going to be super
realistic in our case here. So then you can drag that in and you can kind of see
it just gives it a different type of look.
What else have we got?
So again, this can kind of be...you can kind of take and now that you have it set
up, render it in, you know, a number of different ways and maybe drag this out a
little bit. The other thing you can do is if you don't want all of this grid,
you can just go to the plane and then make it one big sort of square.
The reason you're still seeing squares is because this grid is on.
So from here, you can kind of take and render this out.
Let's go on a new Photoshop.
And then put on the cell and render this here, and yeah.
So there's a bunch of different ways you can kind of move the camera along
or change colors just so that to get different looks, but that's kind of sort
of the basis of this thing that I did.
So yeah.