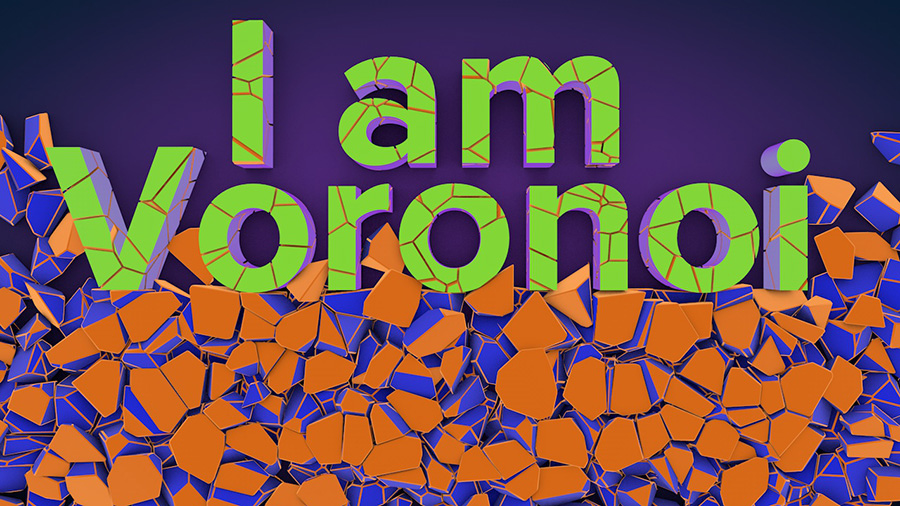
Voronoi Fracture Reference: Fracturing the Fractures with MoGraph Selections
Share this video
The Voronoi Fracture Object can break pretty much anything that has geometry, including MoGraph clones and Fracture Objects. So, you can fracture a fracture… Let’s see how this is done.
Transcript
The Voronoi fracture object can break pretty much
anything that has geometry, including MoGraph clones and fracture objects,
so you can fracture a fracture. Well, let's do that as it sounds fun.
Let's keep it simple and create a cube. Okay, I'm going to make it slightly more
classy by adding a fillet radius, but that's it. Voronoi fracture,
and let's drag the cube into the Voronoi fracture. Now what I'm going to
do is go to the Voronoi fracture, sources, click on the point generator,
and let's put three here. So we have three fragments. What I want to do is fragment
one of these three. So how do I do that? Well, the Voronoi fracture is a MoGraph
object, which means that we can make a MoGraph selection. So, there you go.
Get the MoGraph selection brush, and let's go and select this
one. Just in case you didn't know which one it represents, you can see that it's
more to the left, so it's probably this one over there there. But anyway,
with this MoGraph selection tag now, we will do the following.
I'm going to create a Voronoi fracture and drag this Voronoi fracture into this
Voronoi fracture. By default, all the fragments are going to re-fracture,
but I'm going to select this, go to object, and drag the selection in
the MoGraph selection. So, this Voronoi fracture object only fragments the
fragment that is in this selection. So if I go here and select my Voronoi fracture
and the tag, and let's assume I want to select another one, so I'm going to press
Shift and select this one as well, now you can see that both the pieces get
re-fractured. Or, I can go here and invert, so only this one is going to
be. Just to make it a bit more visible I'm going to add a few more points here,
so I'm going to make it 200, and I'm going to invert this again.
So you can see we have our original fragment and then the other two pieces are
getting re-fractured. Let me select this and increase the distance.
Now you can see the three fragments, one, two three, and only these two are
fragmented. To wrap up this video I'm going to show you how to use the
MoGraph weight paint brush, which is new in Cinema 4D Release 18,
to fine tune your fracturing. So again let's begin with a simple cube with
rounded edges, just to make it snazzy. I'm going to add a Voronoi fracture.
Drop this guy in here. Now what I'm going to do is the following: go to my sources,
and let's set this to three. We have these three fractures. Now what I'm
going to do is go to my MoGraph weight paint brush and I'm going to set the value
to absolute 100%, and go and paint 100% value on this little dot.
Which means that this fragment is going to have a value of 100.
I'm going to click a few times to get this I don't know exactly what the value is,
but around 50%. Now let's do the following. Add another Voronoi
fracture object, drag this in here. Make sure that this is set in the point
generator to create points per object. It's the only way this is going to work.
Go to the object tab and drag this into the MoGraph weight map,
and let's see what happens in this case. I'm going to press A to refresh.
When sometimes your fractures don't update as you expect them to,
just press A on your keyboard to force a refresh. What you will see is
that you have more fractures here, fewer here, and none here. So depending on the
value of the weight map you can generate more or fewer fractures per fragment.
Now you know how to use your MoGraph selections and MoGraph weights to fine
tune your fragmenting,
Le Voronoi Fracture Object peut briser à peu près
tout ce qui a une géométrie, incluant les Clones MoGraph
et les Fracture Objects.
Vous pouvez donc fracturer une fracture!
Faisons cela, comme ça a l'air amusant.
Restons simple et créons un cube.
Je vais le rendre un peu plus chic en ajoutant un Fillet Radius.
Voronoi Fracture, j'y glisse le cube.
Puis, dans Voronoi Fracture, Sources, clic sur le Point Generator,
mettons 3 ici. Ainsi nous avons 3 fragments.
Je veux fragmenter un de ces trois là.
Comment faire?
Le Voronoi Fracture est un MoGraph Object,
Nous pouvons donc faire une sélection MoGraph.
Prenons la MoGraph Selection Brush, et sélectionnons celui-là.
Au cas où vous ne sauriez pas lequel il représente, c'est plus à gauche,
c'est donc probablement celui-ci.
En tout cas, avec cet onglet de sélection MoGraph nous allons faire comme ceci:
Je crée un Voronoi Fracture et le glisse dans ce Voronoi Fracture.
Par défaut, tous les fragments vont se re-fracturer,
mais je sélectionne ceci, vais dans Objet,
glisse la sélection dans le MoGraph Selection.
Ce Voronoi Fracture Object, ainsi, ne fragmente que les fragments
contenus dans cette sélection.
Si, ici, je sélectionne mon Voronoi Fracture et l'onglet,
assumons que je veux en sélectionner un autre,
je presse Shift et le prend aussi.
Les deux pièces sont alors re-fracturées.
Ou, je peux aller ici et inverser, de manière à ce que seul celui-ci le soit.
Pour que ce soit plus visible, j'ajoute un peu plus de points ici,
mettons en 200, et j'inverse à nouveau.
Nous avons notre fragment original et les deux autres pièces sont re-fracturées.
Prenons ceci et augmentons la distance.
Vous voyez les trois fragments, 1, 2, 3
et seulement ces deux là sont fragmentés.
Pour finir cette vidéo, je vais vous montrer comment
utiliser le MoGraph Weight Paint Brush, qui est nouveau dans la version 18,
pour affiner votre fracturation.
A nouveau, commençons avec un Cube simple,
aux angles bien arrondis, que ce soit classe.
J'ajoute un Voronoi Fracture.
Glisse celui-là ici.
Ce que je vais faire maintenant:
Aller dans Sources et paramétrer ceci à 3.
Nous avons ces trois fractures.
Dans mon MoGraph Weight Paint Brush, je vais régler la valeur à absolue 100%
et peindre 100% de valeur sur ce point.
Ce fragment aura donc une valeur de 100.
Je clique plusieurs fois pour avoir ça,
je ne connais pas exactement la valeur, mais ce doit être environ 50%.
Puis faisons ceci:
Un nouveau Fracture Voronoi Object, je glisse ça en dessous.
Je m'assure que le Point Generator est réglé sur Create Point per Object.
C'est le seul moyen pour que ça marche.
Dans l'onglet Objet je glisse ceci dans le MoGraph Weight Map,
et voyons ce qui se passe.
Je tape A pour rafraîchir.
Si votre fracture ne se réactualise pas comme vous l'attendez,
tapez juste A sur le clavier, pour forcer le rafraîchissement.
Vous avez plus de fractures ici, et moins là, et aucune ici.
Selon la valeur du Weight Map vous pouvez générer plus ou moins
de fractures par fragment.
Vous savez maintenant utiliser le MoGraph Selection et le MoGraph Weight
pour affiner vos fragmentations.
O objeto Voronoi Fracture pode quebrar basicamente
qualquer coisa que possua geometria, incluindo clones MoGraph e objetos fraturados,
então você pode fraturar uma fratura. Bom, vamos fazer isso porque parece ser divertido.
Vamos manter isso simples e criar um cubo. Agora para sermos um pouco mais elegantes,
vamos adicionar um raio no Fillet, mas isso é tudo. Voronoi Fracture e então
vamos arrastar o cubo para dentro do objeto Voronoi Fracture. Agora no objeto
Voronoi Fracture, vamos a aba Sources e clique no Point Generator
e vamos colocar o valor de 3 aqui. Então nós temos três fragmentos. Agora o que quero fazer é
fragmentar um destes três. Como eu faço isso? Bom, o Voronoi Fracture é um objeto MoGraph,
o que significa que você pode usá-lo em conjunto com a MoGraph Selection (seleção MoGraph).
Pegue o pincél de seleção MoGraph e vamos selecionar este aqui.
Caso você não saiba qual este representa, você pode ver que é
este mais para a esquerda, então provavelmente é este pedaço aqui. Em todo caso,
com a Tag MoGraph Selection, nós podemos fazer o seguinte.
Vamos criar um novo Voronoi Fracture e arrastar o antigo Voronoi Fracture para dentro
deste novo Voronoi Fracture. Por padrão, todos os fragmentos serão fraturados novamente,
mas eu vou selecionar aqui, ir a aba Object e então arrastar minha seleção para o campo
MoGraph Selection. Agora este novo objeto Voronoi Fracture só fragmenta o
fragmento que está nesta seleção. Então se eu for aqui e selecionar o meu Voronoi Fracture
e também a Tag, e vamos supor que eu queria selecionar um outro fragmento, eu vou clicar Shift
e então selecionar este aqui também e agora podemos ver que ambos os pedaços estão
sendo fraturados uma segunda vez. Ou eu posso vir aqui e selecionar Invert e agora apenas este
pedaço está sendo fraturado. Pra facilitar a visualização, vou adicionar mais pontos aqui,
alterando este valor para 200 e vamos inverter novamente.
Então podemos ver que temos nosso fragmento original e então temos estes dois pedaços que
estão sendo fraturados novamente. Vamos selecionar aqui e aumentar a distância.
Agora podemos ver os três fragmentos e apenas estes dois estão sendo
fragmentados. Para finalizar o vídeo, eu vou mostrar como você utiliza
o MoGraph Weight Paintbrush (pincél MoGraph para pintar área de influência), que é novo na versão R18,
para ter mais precisão nas suas fraturas. Vamos começar novamente com um simples cubo
com bordas arrendondadas, para deixá-lo estiloso. Vamos adicionar o Voronoi Fracture
e vamos arrastar o cubo aqui. Agora faremos o seguinte: na aba Sources,
vamos colocar aqui o valor de 3. Agora temos estas três fraturas. Feito isso,
vamos pegar o MoGraph Weight Paintbrush e eu vou alterar o valor aqui para
Abs (absolute) em 100% e vamos pintar 100% neste pequeno ponto.
Isso significa que este fragmento vai ter um valor de 100.
Agora vou clicar apenas algumas vezes neste outro ponto, pra ter um valor aproximado de
50%. Vamos adicionar um novo objeto Voronoi Fracture
e arraste o antigo dentro do novo objeto. Certifique-se que você tem selecionado o Point
Generator e então habilite Create Points Per Object, já que é só assim que isso vai funcionar.
Na aba Object, arraste esta Tag para o campo MoGraph Weightmap e vamos
ver o que acontece. Eu vou clicar A no teclado para atualizar o viewport.
Quando acontecer das suas fraturas não atualizarem conforme deveriam,
apenas aperte A no teclado para forçar uma atualização. O que você vê aqui
é que você tem mais fraturas aqui, menos aqui e nenhuma aqui. Então, dependendo
do valor do Weight Map, você pode gerar mais ou menos fraturas por fragmento.
Agora você sabe como utilizar as MoGraph Selections e o MoGraph Weigh para
ter mais controle e precisão nas suas fragmentações.