Siggraph 2015 Rewind - Bret Bays: Weighting Workflows for Cinema 4D Character Animation
Share this video
Bret Bays provides insight into the art of rigging, the weight painting process.
Bret demonstrates the importance of model pose and topology before weighting even begins, and then shows his workflow for weighting a character. He talks about joint placement and the function of the Weight Tool and Weight Manager. Bret makes use of his own CV-Weight Scripts as part of the weighting workflow.
| 01:14 | Model Preparation - Pose |
|---|---|
| 04:36 | Model Preparation - Topology |
| 09:51 | Joint Placement |
| 11:33 | Weight Tool |
| 18:19 | Weight Manager |
| 29:03 | CV-WeightScripts |
| 33:11 | Weighting Workflow |
| 43:21 | Re-Adjusting Joints |
| 44:32 | Scaling Character Object Rig to Model |
Transcript
- Hello everybody. Hi everybody out here, internet, everybody on Slack. How's it
going? My name's Bret Bays and I'm going to be talking to you guys about the art of
rigging. When I say the art of rigging, I don't mean like, that rigging as a whole
is an art, even though I think it is. I mean the art side of rigging, right?
Everyone when they think of--especially that Charles Roland guy, he always thinks
that--the art of rigging is in the technical side of things. You know the IK,
the constraints, the spline IKs, all that stuff. And that's a fun part of rigging,
but there's a whole other artistic side to rigging, which is called skinning. And a
lot of people struggle with that, there's not a lot of resources on doing skinning
and stuff like that. But really that's kind of the most important part of
rigging, in my opinion, because you can have the most technically sound rig out
there, but if you deform...when you animate it and it deforms and it looks
like crap, your rig's going to be judged as being as crap. So, how your character
deforms is extremely important. So before we even get into any sort of
skinning, I'm going to talk a little bit about model preparation, because this
actually plays a huge role in how your character will deform. So to start, I'm
going to bring in this really simple model that kind of just illustrates a point I
want to make. As far as your model goes, there's like three things that effect how
your character will be able to be deformed. There is the pose of the
character, like the default fit pose that you're going to be binding to, there is
the topology of the character, if there's enough topology, and also the spacing of
the topology is really important. So these things all play a role in how your
character will be deformed. And so this example kind of, is an illustration for
what I would see a lot in spines. When you get a spine modeled, you know our spines
naturally are not straight, we have a curve in our back, things like that. So
when you get a model from a modeler maybe the spine is kind of curved, arched back a
little bit too much. If you have the ability to send things back to modeling, I
would encourage you to do that, to get something kind of like this, as straight
as possible. Because this is a more neutral pose, right? This is more of
a...like a posed-pose, right? And it effects things like bending, right? You
can see here if I adjust this slider, they have the same bend deformer on them, but
one's just initially shaped differently than the other. You can see we get a nice
clean shape on our neutral cylinder here, but when you look at our posed cylinder,
you get this line break here, then you get a straight line here, so it's very
segmented and it's hard to get as clean and as appealing of a deformation. And if
they argue with you about, you know, well that's not how a real back is, you can
just reassure them that if you give me this on the left, I can actually reach
this pose through the rig later on. And you could make that the sort of standard
animation pose, but as far as deformation goes, something like this here works
better. So the next thing relating to your geo is,
here's just another example of this, right? A really complicated example of
this. This applies to faces as well, right? If your character's face is given
even like the slightest expression, it can have an effect on how you weight your
character. So here's two faces; one with a very neutralized face that's just
perfectly straight, and another one that I wouldn't even say he looks like he's sad,
it looks kind of natural, it's kind of a normal-shaped face. But you can see these
both have the exact same weighting applied to them, there's no difference in them
except for their default position. And if you look at this one, the smile is kind of
subdued in a way, compared to the one on the right. You still get a nice enough
shape, right, so it would probably work, but you can see that this gives me the
really extreme shape. That's because it's fighting that initial downward angle on
it. And if I keep going, you'll see that the frown is actually now even more
extreme, because it already had a little bit of that in there, whereas this one's
kind of a more balanced frown. So it applies not only to like your character's
position with the limbs and the spine, but also in the face as well. Things like the
brows, you don't want them in like a already furrowed shape or anything,
because you're going to be battling that later on. Now I mentioned that topology
plays a role in how your character's going to deform. You need not only enough
topology, but you kind of need to worry about how the topology's spaced out,
because that can have an effect on how your character deforms. So if I go forward
here to frame 10, actually frame 20. Right, this one that has very low polys,
there's not a lot of deformation that can happen, and because this one's blending
between two joints it means it's going to be collapsing a lot in a lot of areas. You
can...it collapses on the top, this side, this side, and here.
So adding a little bit more topology will help. So down here we've got a few more
spans. And if I scrub ahead, you can see we get a little bit better deformation up
here on the top of the knuckle. But because of the spacing between these, how
it's pretty much still the same, we're losing a lot of volume here, so it doesn't
feel very fleshy, doesn't feel very meaty at all. So then you have this third one
here, which has an extra span in here that cuts the length of that edge in half,
which means we can retain a lot more of the volume here. We can soften out some of
this area as well. Now if you look at these, though, all of these spans are kind
of sliding at an angle, which actually isn't very good. I could work with it, I
mean you could work with it too, but ideally I'd like them better if they were
more up and down. So if you can see the difference between this one and this one,
same topology count, it's just one's had the edge direction sort of changed. You
actually can get a sharper knuckle up here because--I can't get a sharp knuckle
because the edges are actually pulling away from that area. So by just
straightening them up I can get a little bit better, crisper knuckle deformations
right there. So that's topology and the spacing of your topology. So how does this
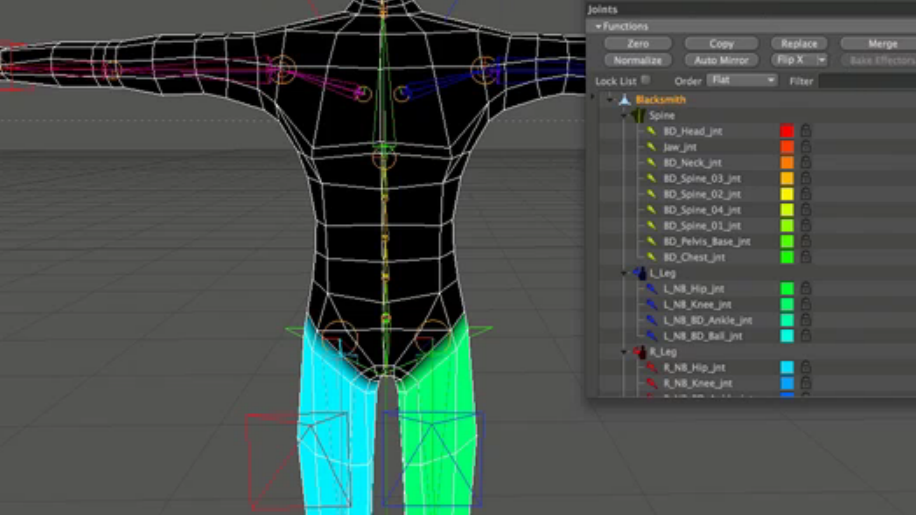
apply to working with a modeler? Well, so this was a model that was given to me by
Glen Southern, thank you Glen for modeling this in such a short time. And this is
what he initially gave me, which on the surface looks great. You know, even
topology wise, the count's not too high, which works pretty well for me. But I was
looking at it, and there's few problems with it. So what I did is I drew out some
joints to kind of illustrate some of the problems of what I mentioned a second ago.
If I can get all these to turn off. So I just drew a few joints in here, and
if I go to my side view you can see that, right off the bat my character has this
sort of lean-back in his posture, right, where his hips are kind of sitting forward
a lot and the legs--the heels are back. So I don't really have this straight up and
down sort of feeling inside of his pose. So that's going to be hard, I'm going to
be battling that a lot in the spine and in the legs. Another thing is, I drew out
just a joint for where the arms would be, and I could see that the elbow's really
low. And that doesn't matter too much on an elbow, because it just does sort of you
know this normal motion, it's not like I can break my elbow, but I'd like it if the
spans were more in the center of the mass. Usually when you're skinning you want to
do center of mass for where your joints are placed. And I'll show you a file of
that in just a bit. But you can see also from the top view that the arm's kind of
swung back a little bit too far, as well so. There was a few issues with that from
the model's perspective. And I can show you kind of the notes and suggestions I
gave to Glen. So again if you have the ability to go and make these adjustments
with the modeler, or if you modeled it yourself, you should definitely do these
sorts of things. There was a couple of issues, right? I talk about the arm's
swung back, but also the ratio between the elbow and the forearm is not very
accurate. The forearm was significantly longer, so that means it's going to look
kind of weird when he's moving. So I pointed those things out to him to get
him. And I sent him this file back with these joints so he can use them as sort of
references for where to move stuff. And then when it came to...ah...hello
Photoshop. When it came to the body right, I gave him this sort of demonstration here
of how off it is from the center. But I also asked him if he could to try to
neutralize the spans, because you can see they're kind of flowing upward in there.
If they're more straight that means you can probably get away with doing the
entire loop kind of the same weight values. When there are differences in
position like that, then you have to do the front at a certain weight and the back
at a certain weight. And it just, it takes a little bit more time, but it's not the
end of the world. So then with all that he gave me a new
file. And this is the new file in the front and then the old file in the back.
And you can see now he's definitely much straighter. From the top view, the arm is
pretty straight as well. The ratios, you can see he moved the elbow a little bit
further this way, shortening the forearm, and this gives me a much better sort of
starting point for rigging this character. So, that's my quick spiel on how your
model can effect your weighting. Oh, and I mentioned joint placement, right? I said
that center of mass is typically where you want your joints to be placed, right? Even
though anatomically speaking, your spine is in the back, this causes certain
problems when you do bending, right? By favoring one side or the other, you're
going to actually effect the opposite side in a negative way. So usually the center
is kind of the lesser of two evils in a way. It gives you more normalized sort of
deformation. So you can see these all have the exact same weighting applied to them.
And if I just go to say frame 20, you'll notice that the one that has it in the
front, he's taller, he's growing in certain ways, and he's longer.
Whereas--and that's because he's in the front. So a front bend is what he's
favoring, but that means that it elongates the back. Whereas the back--the one that
joint's line at the back, bending forward actually compresses. He's actually shorter
and lower than the middle guy. And that's because it can't really...this front bend
is what is kind of being sacrificed when you put the joints there. Versus the back,
right? You get this sort of opposite effect on each one, where this one now is
shorter over here and this one's now longer. But this one stays nice and
consistent both directions, so, generally speaking, center of mass is the best place
for you to put your joint. Obviously like in areas like the jaw, that's...what is
center of mass of the jaw, you know? You have the whole head, where does that go?
That's where it gets a little bit trickier, but for things like spines and
arms and legs and fingers, usually center of mass gives you a better starting
position. All right so let's talk a little bit about
the tools we have at our disposal, right. This is kind of a really basic
introduction to some of the tools we have for applying weights to characters. And
really you have two major ways to do that; you have the paint tool and the weights
manager. So to start, we'll use the paint tool, which you can access by, if you have
a weight tag, you can double click on it, it will take you right into the paint
tool. Otherwise, character menu, paint tool. And, or excuse me the weight tool.
Sorry the paint tool's for vertex maps, the weight tool's for character weights.
So you have a lot of options in here. It's a basic sort of brush, it allows you to
click and drag and paint things. There's a lot of options in here, but you don't
typically need to deal with all of them. These ones all up here pertain to how and
what you're painting on, whether it's only visible elements, only selected elements,
whatever. I definitely would recommend keeping auto normalize on because you need
to make sure your weights are normalized. You have the strength, which is how much
you're going to be painting. So I'm going to set this to say, 50%. And you have all
the different modes. And Cinema 4D has a ton of modes out here, but really the most
used ones will probably be add, abs, which is absolute, smooth sometimes and erase
sometimes. You don't really need erase because if you just add to another joint
it will erase from that same joint. So let's say I have this set to abs, 50%. I
click and it will paint at 50%. Oops. Actually I need to, make sure you have a
joint selected in this joints tab here. This tells me all the influences for a
character. In this case there's just two for this simple example. I click on one of
them, and I can click and paint, and it will automatically paint on there.
Now one trick, not really a trick, a tip I would suggest for people. By default the
falloff for your brush comes in at hardness, right, I've actually turned it
off on accident already. But it comes in at hardness. And I would recommend for
anyone starting out to set it to none. I don't usually ever paint with a falloff.
And the reason for that is, if I set this to be absolute, this means I want to
click... I'm expecting wherever I paint to be 50%, right. So I click and I say all
right, 50%, right here, boom. But if you actually mouse over this, right, this is
actually saying 24.9, 15, really only this center point, the center of my radius, is
what's getting that value. So it's not even--it's not being as precise as I need
it to be. If you set it to none, wherever you click, anything inside that radius is
going to be that value. All of these you can see are 50%. So if you have a falloff
you may find yourself wondering like how are these weights getting distributed,
what's going on here, I don't understand it, I set it to this value; it's probably
because of the falloff so turn that off. You have options for clamping, yada yada
yada. This is good, you can clamp between upper and lower values. Like I said you
have a display of joints of all of the influences on your object, and you have
these lock icons. And I'll try to get into that a little bit later. But you just
select which ones you want to paint. Really nice thing about Cinema 4D that a
lot of other programs don't seem to have is, I can actually paint on both joints at
once. So you can see now that I painted both A and B to 50%. So that's a really
handy thing. So if you wanted to just quickly set an area to be 50/50 between
two joints, you can just crank your strength to 100%, select the two
weights--or the two joints, and paint it, and it will be automatically update that.
You've got options for how you choose to display this. It's got flat, you could
choose it if there was a hierarchy. Usually I say name, because then it puts
it in alphabetical order and that will become a benefit later on, which I'll show
you. There's a lot of display settings in here, I wouldn't really bother worrying
about it too much. But one really awesome thing about the weight tool is the
symmetry painting. Let me pull up a file here. So the symmetry painting does
exactly what it says, allows you to kind of paint symmetrically. But there's an
awesome mode inside of this tool called "name, " right? Ignore the other two,
don't even bother with the other two because name is the best one of all of
them. You set this to name and it asks you for a left and a right side, and these are
asking for prefixes for your rig, right. So if your left side joints have a prefix
of say, L underscore, or your right side has R underscore, you'd want to put that
into these fields. So this is what it's going to be looking for to determine
whether it's a left or a right side joint. Right, so we have left and right. You have
a coordinate space, I typically just use world. And then the mirror plate, which I
typically use y-z. Now the nice thing is, if I go into my joints here and I
say...make sure everything's unlocked. I select my collar joint, my left collar
joint, I start painting on it, oops. I didn't unlock everything. Let's see here.
I start painting, you'll notice that as I click and drag it, something's happening
on the other side. And you can tell because it's a different color, it means
it's actually a different joint that's being influenced by that. So if I mouse
over this I can see, or I can kind of see that this is in fact doing stuff to the
collar joint, like I said. The left collar joint. And if I look over here, it's
actually painted the exact same thing but on the right side. So this means you can
only focus on painting one half of your joints and it will do the other half for
you automatically. Now the reason why this tool, or this mode
of symmetry is really awesome, is because if you select a joint that maybe, that
isn't a left or a right side joint like one of your center line joints, it's smart
enough to know that it should just paint symmetrically. Right so if I click and
drag down here, notice that it's painting on the same joint but on the opposite side
for you. So that actually means you can literally paint only half of your
character and it will do the entire character for you. So that's a real plus
of the weight tool. Now every plus kind has a minus. The downside to the weight
tool in my opinion, is that it's a paintbrush, right? Painting can be a
little bit slower, like if I wanted to paint all around this, I'd have to do
this, and then I have to make sure I go around and do this. It's a little bit more
tedious, but that symmetry mode is pretty awesome so it kind of makes up for that.
Now the other, let me switch back to my other seed file. The other way you can
apply weights through the weights manager, which you can access through character,
manager, weights manager, or you can shift double-click on the weight tag and you
could bring it up. And I should note that you're not isolated to using one or the
other, you can totally use both the weight tool and the weights manager. They're just
kind of meant for different workflows of how you're going to be applying your
weights. And at first glance they actually look pretty similar, right? If I bring up
the weight tool again, we have a lot of the same options. In fact our strengths
and our modes here, are linked. So if I adjust one in one mode, you'll find that
it's adjusted in the other one as well. Same thing for the mode you choose. We
also have the same list of joints, right? I can select one in one, it will select it
in the other. So these sections are linked. The key differences are in all
these sort of buttons and some of these other tabs. The weights manager is meant
more as a, like a selection-based workflow, right? Where you can make some
selections and apply weights to that selection, as opposed to a painting
context. So that means is I can do something like select a loop here, and
apply, right? This apply will work on any selection I have. It works on edges, it
works on polygons, it works on points. So this is really handy because Cinema 4D has
really good selection tools so you can do things like loop select, fill select, to
easily grab large areas of your mesh, and just click apply selected to quickly apply
the weights to that. Now there's also some other buttons in
here that are pretty handy. So back in here. Revert it. So you've got buttons
that will...let's see. This one does not have the weights I want. So you have these
buttons here that would allow you to...let me just quickly adjust my weights real
quick. Let's say the chest. Apply all. So you
have these buttons here that do things, you can zero out all the weights on
them--on a particular joint, you can copy weights from one joint to another. So I
can take my collar joint here, and I can copy it, and paste it on any other joint,
maybe my right collar joint, and say replace, and it puts it on that joint as
well. So this means if you find yourself painting on the wrong joint you can just
quickly copy it and replace it to the correct joint. In addition to that,
there's also merge, which is, it will add it in without replacing all the other
weights. So if I were to say, well I'll show you merge in just a second. The cool
one though is this flip x, flip y, flip z button, which allows you to basically take
the weights from one joint and flip it to any other joint, or to the other side of
your mesh, allowing you to quickly and easily mirror a joint. So what I can do is
I can copy this joint, go to my right collar, replace it, oh, I've already did
it on that side. Well then I can take it on my left joint, and flip it, so now I
have the left joint and the right joint have the same mirrored weights now. The
difference is in merge, right, there's this merge button. If I copy my left side
again, I can go into my right side. If I say merge, it's just going to merge it in
without replacing what was there before. Whereas replace will just wipe away
everything that was previously there and then apply it.
You've got things like normalize in here. Usually I'm just dealing with copy,
replace, and flip. You've got a weights section here that kind of gives you sort
of a spreadsheet view of all of your weights. If you're familiar with Maya,
it's kind of like the component editor. The nice--you can do things like you can
filter it out to be only a selection or between, only show you values between two
values kind of a thing. You can add weights here, you can also round out your
weights, which is kind of nice. And one handy thing is if your weights aren't
normalized, they're displayed as red inside of the weights manager so you can
quickly and easily see, hey I've got weights that aren't normalized. Then you
have auto weight, which might not seem like it's very helpful, but the nice thing
about the auto weight here in the weights manager is that you can restrict it to
selection, and restrict it to specific joints. So if you had say like a tail,
right, the auto weighting algorithms can usually handle a tail relatively well. So
you could actually just make a selection of say...we'll just go into here, make a
selection like so. I'll just fill it. And I can say restricted to the selected
points. And it's going to also restrict it to whichever joints I choose, so I'm going
to choose all my forearm joints, and say calculate. And you can see it's only done
stuff here. But if I zoom in you can tell that it's blending between forearm one,
forearm two, then forearm two to forearm three. So you can use this to quickly and
easily auto weight sections that you know it can do well. So that's pretty handy,
whereas the bind command kind of just does everything, it does every joint and every
point. So it's a good way to sort of get you a starting point on certain areas.
Let's see. Now we have, I've mentioned normalizing a lot. When you're painting
weights, your weights or your points have to be normalized, which means that all of
the weight influence objects that are effecting it have to come up to a total of
100%. If it's less than 100% it's going to drag behind. If it's over 100% it's going
to actually double transform. We'll see if this kind of shows this, because we saw,
we saw in our weights manager that we have weights that aren't normalized, right?
This one is only at--this one's got 130% which is going to shoot further. And a
quick thing that I like to do to test this, right, if I painted everything I'd
like to go in and say move my character, the whole rig 1,000 units. And that allows
me to quickly and easily see, it's enough distance that I'm pushing that I will be
able to see easily which points are dragging behind and which ones are
shooting forward. And I can go in and start selecting them and fixing them that
way. So that's a good little way to test for normalization. Oh, one thing I didn't
really mention about the weights manager, right, with all that flipping and copying
and pasting. One of the nice things about it is that, there's two things right. All
the copying that I was doing can also be selection based, so I can only select a
certain portion of my mesh, and it will only copy the weights from that area and
apply those weights. So instead of having to do the whole joint and all of its
influence, you can do just a specific region and then copy that or flip that or
do whatever you need to do. The other nice thing is, you can actually do it on all
the joints, like you can do it on multiple joints at once. I can copy all the
elements from my left arm component here, go to my right arm component, select them
all, say replace, flip x, and I've basically copied--just totally mirrored
all of my arm from my left to my right. The important thing to know is that you
want your order to be the same, which is why I prefer using the name mode, because
flat may not have the same list, the order list of your joints. So setting it to name
will give you that. And this allows you to basically do, you can do an entire left
side, not just the left arm. I could grab everything pertaining to the left side
here, which the left legs aren't actually painted in this seed file, but I could, if
I deselect these components here. I could copy all those and do it all the way to
the right side as well. So that's a really handy thing. So I mentioned the cons of
the weight tool, the cons for the weights manager is that it doesn't normalize very
well, right. All this copying and pasting I'm doing, it doesn't self normalize,
which is unfortunate. So you get the faster workflow of selection base being
able to quickly select and apply to to those objects, but you have to worry about
normalizing your mesh, which for the most part isn't a huge deal. Right, if I say
lock all these, and let's say I flood everything to my chest. Let me unlock all.
Lock these. And I flood everything to the chest, right? Right, so everything except
what's pertaining to the arm, is on the chest right now. And if I do the same
thing of copying these and then trying to apply it to the right side, so I say copy,
uh oops. Not copy, I need to say copy here, choose replace, flip x. You'll
notice that if I click on my chest again, the chest still has all this influence as
well, so now if you look at the value, I don't know if that's terribly visible but
it says 200%, right? The HUD tells you exactly how--you're total normalization,
all the influences, which is another really handy thing in Cinema. But I can
see right away that this is 200%, that means it's not normalized. So you have to
deal with that yourself. And it's not terribly hard, you can just do something
like do a loop select down the center line, fill select the side that is painted
properly, and I could say copy, flip x, and you'll notice that it flipped the
entire thing, but now the right side is correct and I could say replace. But it's
going to only replace what I have in my selected. And so now, if you can see that
now, they're all down to 100%. So it's an extra step, but it's not a terribly hard
step to do. It's just something you need to be mindful of when you're copying and
pasting joints like that. Some of the other tools that we have,
they're not native but they're available to anyone who has Cineversity. They're
part of the CV toolbox scripts. They're called CV weight scripts, and the ones
that pertain to actually applying your weights are copy weights, paste weights,
hammer weights, and this blend weights along path. So what copy weights does,
copy and paste weights, pretty self explanatory really. It allows you to say
copy the weight from any point, so I'm going to say hey I want this point, this
point looks great. I'm going to, I'm using a shortcut here, but I'm saying copy, and
I can select any one or any multiple points really. I can select all these
points and say paste weights, and you can see it'll paste it there as well. So this
is handy if like you've gotten one section figured out on a loop maybe. You can copy
it and paste it to all the remaining elements of the loop. There's also the
hammer weight script, which is kind of like a smooth script in a way. It
basically looks at whatever point you have selected, and unfortunately I don't really
have a great demo of this right now, but what it would do is it would look at this
point, right, and say what are my neighbors, right, which are effectively
all four of these points. It grabs all the weights for those points, averages it out,
and then applies it back to our original joint. So if you're finding that there's
an area that's ma--like just a couple stray points that are not in the right
spot, you could either copy paste, or you could do this hammer weight script as
well. Now my favorite script in this whole pack is the blend weights along path. Now
let me revert this to saved. What this script does is it allows you to create a
linear falloff between two points along an edge path, right. And the falloff that you
create is kind of important. This is what really allows you to get nice compression
in certain areas. Like if you think of brows, right, if your brows go up, you get
this compression that kind of happens up here, and when they go down you want a
nice stretching that kind of happens here. So it's really about creating a nice
falloff in there. And the CV blend weights along path allows you to do that very
quickly and easily. So if you look here, I have this left side
is all to the B joint and the right side is all to the A. Everything in between is
just zero, it's just so you can see it better. If I select these two points, and
they see they're on the same edge path, and I run the script, it creates a falloff
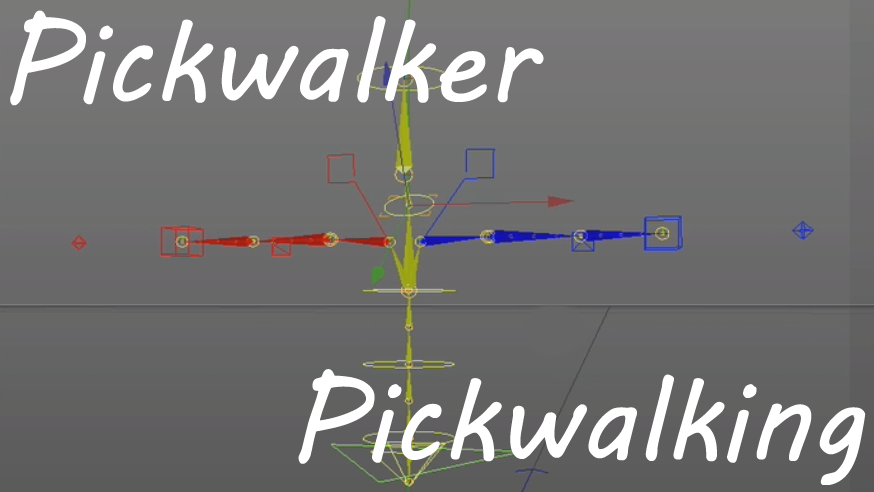
between the two of them. Now this becomes extremely powerful if you combine it with
some other scripts on Cineversity like the CV pick walk scripts, which allow you to
kind of pick walk around. So doing shortcuts right, I can take this, I'm
going to just do this all with shortcuts. I can jump down, jump down, jump down.
Just do this really fast and easily. And now if I play you can see I get a nice
accordion sort of compression that happens. So it's a very powerful script,
allows you to really work on the falloffs there. And the nice thing is like this can
just be a starting point. Maybe you don't want a pure linear falloff. Then I can
just kind of go in, start selecting some of these weight--these loops, and just
start adding weights where I need them. In addition to that, you've got a couple here
that are handy, which just basically set the strength slider. They're really useful
if you set them to shortcuts like, if you watch the strength slider here, pressing
the plus key, this lets it jump up by, I'm using the plus ten basically. I've got
them short--mapped to shortcuts to use plus and minus. And then using control and
shift as modifiers to go from either 10%, 5% or 1%. So that means very
easily I can jump around, get really fine details, go up by 5, down by 5, up
by 1, down by 1, 10, up or down. So really handy for just quickly knowing I
need to add a little but more weight, increase my weight some, or I need it to
be a smaller amount. That sort of stuff. So that's about it for all the tools. I'm
going to just kind of demonstrate my sort of workflow. And my workflow is by no
means the best workflow. Find out whatever works best for you. But what I do is I
will start off by, whenever I start a character I usually just flood everything
to the pelvis. And I'm using the character object here, I assume most people will
probably use the character object because it gives them a rig very quickly and very
easily. So I usually flood everything to the pelvis to start. And then I just kind
of work my way up the spine. So the first joint would be spine one, which is right
down here. And I kind of look around to see okay what loop does it sort of start
at? Oh, maybe it's about this loop. So I'm going to loop select here, I'm going to do
it in edge mode actually, fill select up above it, so I've got everything else, and
I flood that to the spine one. So now everything in my character is bound to
either pelvis or spine one. And that means that's all I want to focus on right now.
So what I do is I lock those influences. So I say lock all, and then choose unlock.
Right so that means only spine one and pelvis are unlocked. And I do this because
this means everything else can't seep in, right. If I start smoothing or something,
maybe I'll get influences that I didn't mean to have come in. I'm only focused on
these two joints. So locking it kind of restricts it to only do what's unlocked.
And usually I'm only working about two joints at a time. Now in order to actually
test your weights and see if your weights are any good, you need animation. So I
grab a controller, I choose...let's see what do we got here? I usually go about
ten frames and I choose a value. And you want to choose a value that's not super
extreme that your character would never do, but not so light that your character,
you know. If your character's going to be hunched over a lot, you know you want to
make sure you can hit that pose in your weights. So your animation should kind of
reflect that. But it's not like we're making a
masterpiece here. So I usually do something around 40 to 60 degrees of
rotation at a time. So I say keyframe there, go to frame 20, I'll do it
backwards so I'll just negate that. At 30 I'll put it back to zero. Aww man, who put
this in advanced mode? No thank you. Whatever. 30 I go back to zero. And then I
also do kind of the side to side bend. And the side to side usually doesn't have to
go quite as far as the forward-back, so maybe that could be a little less. So
minus 30, and then 30. So this gives me my range of motion that I need for this
joint. And then I just kind of start going in. And there's no magic solution to this,
I just start going in and starting with, kind of loop by loop. I take a loop here,
this is spine one, this is kind of where the two joints meet. That's a little high.
This one might actually be better for where the two joints meet. What I can do
is grab both of them. Something like that and then say apply. So this puts them both
at 50%, so now it's about making this transition up and down. And so I kind of
just focus on one joint at a time. So this is going forward, and it's crunching too
much so I need to bring some of this back, I need it to kind of not be bending as
far, so I put it back on the pelvis, because the pelvis isn't actually moving.
I set it down to something low like 5%, and I just kind of start clicking around.
And just kind of knowing that this one's 50% that means this loop probably is not
going to be 50%. It should be less than 50%. So I kind of have that range, and
say, oh, 40% okay. Then I kind of move up to the next one, start doing' a few there,
that gets me to say 20%. Just like this. And then maybe just one there.
And then I'll do the opposite, I'll go, I'll work my way down as well, because
we're still getting some crunching happening here. So then maybe I need to
start adding some of this back to the spine. So I can say okay well I'll just
start adding a little bit more here. And now maybe, it's just kind of evaluating
what's going on and adjusting it accordingly. Like maybe this loop I don't
want 50/50, maybe I do want it favoring one more than the other. So I start
putting a little bit of that back into the base, or to the pelvis. This gives me
something like this. Use a little bit of spine one here. Something' like that. Just
as a quick demo, that's sort of what I'm doing there. And I check it for the back
bend as well. All right and that's good enough, I think. Check the sides. And then
once I've, we're going to just call this done, at least done enough. It's actually
not terrible. Once I've done that, I'm ready to move on to the next joint. So
what I do is, I don't need to worry about the pelvis anymore, that falloff I've
created on the pelvis is good, and it's exactly what I want, I don't want anything
to touch it. So I lock the pelvis, and I kind of proceed up the spine and do the
exact same process. Because it's the advanced biped, I'm using... And I'm using
the FK spine right now, I'm going to ignore joints two and four, because in FK
mode they do nothing, they just follow along what their parent does. So really
the second joint I go to is spine three, so I can see all right spine three is
right here. So I'm going to select this loop, fill above it, flood everything to
spine three. So like I was saying, I kind of just do
this process the same thing. You see, I flooded everything to the spine, I'm
worrying about that. And then what I do is I'll just take the animation from my spine
one controller, I'll do control A, cut it all out from there. I actually need to
make sure I zero this out, though. Select my spine three controller, and then paste
it in there. So now I have the same animation as I did before. Whoa. So I have
the same animation as before, and I'm just working on that same falloff kind of going
down. Nothing special, nothing fancy. It's kind of a tedious process but, it's kind
of a fun process because this is how my character's going to look when I animate
it. So I basically do that all through the character. Nothing complicated or trickery
or anything like that. Then I can get to something like the clavicle area, right? I
try to work with just two influences unlocked at a time because then it's
easier to manage, but then when you get to something like the clavicle, you get into
this sort of trickery area, because you have the neck, you have the chest, and
then you have the clavicle, so there's going to be multiple influences. But if
you've painted your neck from your chest you can try to leave that untouched. So
I'm going to just be taking away from the chest to the clavicle, and the process is
more-or-less the same, I worry about bringing it up, something like 30 degrees
maybe. Going down isn't as important but I'll just do a quick little one to go
down. We go to zero, and then I also get a sort of forward and a backward swing. And
your clavicle itself isn't going to do a lot of that, but this is just for testing
your weighting to make sure it's working out.
Just something like that, to here. Right and I do the same sort of process as
starting. I'm going to unlock my collar bone, because that's what I need to work
with, and then I'm also going to make sure I have my chest unlocked. So, working'
with just those two joints. I make a selection, I flood the entire arm to that
selection, and apply it here. So this gives me some motion that I kind of just
start playing with. And I see okay I need this falloff to kind of happen from here
to here. One thing I'll mention about that blend loop, that blend weights tool is
that it doesn't take into account locked influences. So if there is influence from
the neck here, which in this particular case there isn't, but if there was it
would include that in that transition, so be careful of that. That's how you might
find maybe your neck influence coming down into your arm or something too far. So I'm
going to select these two and I'm going to run the blend weight script, so I get this
nice sort of fall off, right. I kind of just do the same thing throughout it. This
is where I start to sort of utilize those scripts a little bit more than just
applying a selection. Work down, work down. And then I'll check it in all the
views, all the directions its going. I'll see how it's working forward, and I
actually can see that hey maybe this is, its a little too shallow. Maybe I want
this to, maybe from here to go almost to the center like this, and blend that, and
I'll work my way up that way. Things like that, and just kind of going through the
back and the front. It's nothing crazy or special, it's just working at it. And the
more you do this sort of stuff the better you'll get at it.
One thing that I'll say, I'm going to jump out of some weighting stuff, talk a little
bit about a couple character object tips and tricks before I run out of time. One
thing to note though, if you're finding that where you've positioned your joint
maybe isn't working right, maybe you see that it's growing in one direction or
shrinking in the other like we saw in that example video, you can go in and adjust it
in the character object, which is really handy. You just go in, you would say
adjust, and you can just... Maybe your shoulder is a little bit too high, you can
just grab it and bring it down. Oops. Bring it down a little bit, you know,
readjust the rest of your joints, make sure they're in the right place. And then
you would say, go back into animate. You'll notice that it drops, so all you
need to do is click on your weight tag and say set bind pose. Now what set bind pose
is doing is it's just saying this position of all my joints is considered a default
position where no deformation is happening. So you don't want to click this
for just any sort of weird problem you have, because that's going to basically
say that, you know if you curl your arm and click it, your arm's going to go back
to straight, but this is going to be default. So if you straighten your arm,
your arm's going to get mangled. So, really only need to do it if you've
adjusted the default position of your joints and you just want to update your
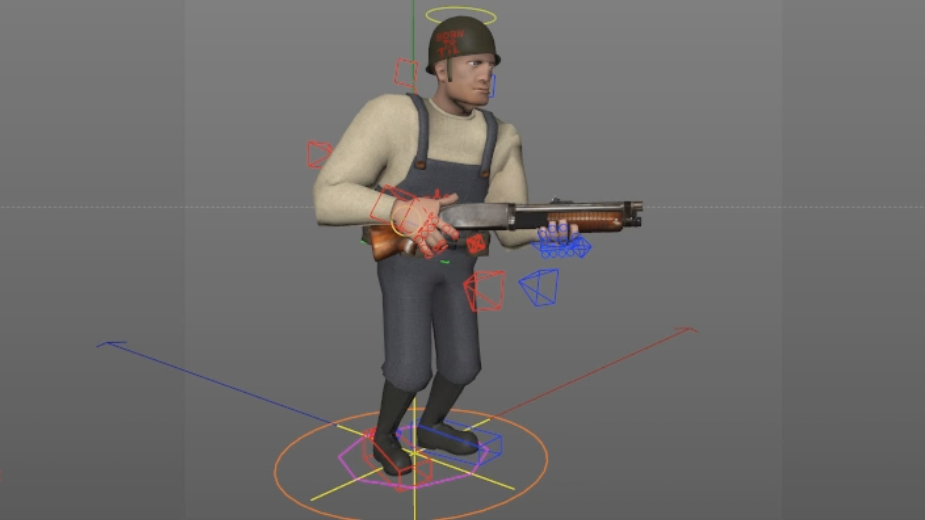
weights. I wanted to mention quickly about
scalability of your rig. Let's say you've got a character, let me just grab him, and
do this, do it live. If you've got something like this, and say your
character's really large. When you build the character object by default, it comes
in kind of small. Right, you can see that this is the size here. You have the
ability to change this. You can scale the build size of the character object, which
is useful because if you tried to adjust this to this guy, you're going to probably
tear your rotator cuff, like having to travel so far with the mouse. The other
thing is, you're going to have to adjust every single one of these controllers,
because look how tiny they are, they're just... They'll be buried inside your
mesh. So what you can do instead is go into the character object, you can switch
the basic tab it has this auto size. You want to turn that off, select your
character, and grab it's size in y, which in this case looks like about 1280. You
grab that and you paste that into the size, and then rebuild. You're going to
get a character that may not be exact to the proportions of your character, but the
scale is normalized to that height. And so you can see now, there's still a few that
I have to adjust, right. Some of these may have had to get a little bit further out,
but it means less adjusting on the controller level, which is nice. And if
you didn't know you could adjust controllers, you can. Just go into adjust
mode, switch this from components to controllers, and it will let you adjust
those controllers. Speaking of adjust mode, I want to get
this PSA out of the way because I see this a lot on forums. When you're in adjust
mode, when you're in any mode really, you do not ever want or need to click on one
of these component objects and try to adjust it or move it or rotate it.
Particularly in adjust mode that's quite destructive, right? If I grab this and I
say, I move it down, notice that the symmetry is not--acting up here, it's not
working properly. That's because you're moving something that's not an adjustment
handle and it can't match it. And now if I try to adjust something that is an
adjustment handle, it's not going to be--it's going to try to move it, but it's
not going to be correct. So general rule of thumb, never select these objects and
try to translate them or anything like that.