A Cinema 4D Primer for Maya Artists: Transforming Objects
Share this video
This video shows how to use the Move, Rotate, and Scale tools, explains the difference between the Size and Scale attributes, how to change the position and rotation of an object’s axis (pivot point), and how to freeze transformations.
Transcript
In this video, we'll take a look at moving, scaling, and rotating objects,
and also add freezing transformations and modifying pivots, or axes, as they're
called in cinema 4D. Many of these things will be familiar to you from Maya, but
there are a few gotchas that we'll try to cover here. So, our mission today is to
move these trees so that they look more like a forest instead of a tree farm.
When we change the Display Mode for the landscape, you can see that the trees are
also stuck inside the hills, so we need to free them. Let's start with the Move tool.
You can click its icon in the top palette or press the E key. In fact,
it's active by default when you open a scene, so you can immediately click on an
object and move it which is pretty handy. Just the treetop is moving so we need to
select the parent null in the Object Manager if we want the whole tree to come
along for the ride. Let's change the viewport arrangement so that we have an
aerial view to help place the trees along the X and Z axes. If another tool is
currently active, such as the Rotate tool, you can hold down the Forward key to
temporarily switch to the Move tool even though the manipulator doesn't change.
When you release the key, the previous tool takes over again. These are called
"Sticky Keys" in C4D. As in Maya, you can drag along each individual axis or click
the plane handle and drag to move along only that plane.
One thing that's different from Maya is that you can move an object by just
dragging freely without touching the manipulators and without using any
modifier keys. If you don't want such a sense of freedom, you can easily lock any
of the axes using these buttons in the top palette or the X, Y,
and Z keys. For example, we'll lock the Y axis or press the Y key so we can move the
trees in only the XZ plane. again, without needing to use the manipulators or any
modifier keys. And we'll just move each of the trees here
on the left side. Now we'll unlock the Y axis and lock the X and Z-axes or press
the X and Z keys. Now we can move these trees only in the Y axis so that they sit
on top of the hills. And when you're done, remember to turn off the locks.
You can see that transforming the parent object also transforms its children in the
same way. But let's say that the parent wants a night out without the kids tagging
along, all you have to do is hold down the 7 Sticky Key and instant freedom.
This is the same as the "Preserved Child" option in Maya. We'll just undo that,
because the parent feels guilty and needs to get home. By default,
you move things in World Mode, which you can select here in the top palette or
press the W key to toggle it. World Mode is the same as World Mode in Maya and
transforms any object in relation to the Global Axes. Object Mode transforms the
object according to its own coordinate system. You can see that its axis has
changed orientation so that the leg moves along these lines instead of straight up
and down. There's no Parent Mode in C4D for objects so children do their own thing
and follow their own axes in Object Mode. Whether it's the same as the parent's or
not, as with the foot here. When you transform an object's components,
however, they always follow the parent object's axis in Object Mode.
As you can see for the selected points on the foot. As in Maya,
the transformation values in the Coordinates Manager here represent an
object's local values that will be keyed regardless of whether you're in World or
Object Mode. The manager shows Object Relative Mode by default, but you can also
see the values in World Mode or Object Absolute Mode.
But we'll leave this in Relative Mode for now. And this manager is like a
mini-version of the Channel Box and lets you enter more precise transformation
values than you get with the manipulators. You can just type in a value and press
"Enter" or drag up and down on the arrows. You need to click "Apply" or press "Enter"
to execute these values. You can press the Shift key while you drag the arrows for
larger increments of 10 units and press the Alt key for smaller increments of 0.1
units when you're fine-tuning. Math operations are also supported in these
fields as relative operations. For example, you can append +60 to add 60
units to the current position X value. Or append *2 to multiply the Y value by two.
And a /2 to divide and bring it back down to earth. Basic math is just a beginning
for what you can enter in these fields. Let's say you want to move the tree back
by 2 feet, but you don't know what it is in centimeters, which is the current unit
in this project. Just append +2FT, and it adds the correct amount of space in
centimeters. If you want to see all the possible functions and operators you can
use in these fields, check the "Appendix Formula" topic in the Online Help.
You can also change transformation values on an object's Coordinates tab in the
Attribute Manager. Here the effect of your changes is immediate when you use the
arrows. The position and rotation values are the same in both managers, but the S
that you see in the Attribute Manager represents scale and not size.
Why are these different? It's because size and scale are two sides of the same coin
in C4D. The size is an absolute value in the unit of measurement that you have
chosen, as you see in the Coordinates Manager. When you're in Model Mode and
setting up the size you want for the base object, you can alter an object's size
using the Scale tool or press the T key. But this doesn't change the object's scale
values. You can also hold down the 5 Sticky Key to temporarily switch to the
Scale tool if another tool, such as the Move tool, is active. Then release the key
when you're done, but we'll just switch back to the Scale tool.
You can scale uniformly by just dragging anywhere in the scene or scale on a
particular axis or a plane. And here's a nice tip if you
want to see the total size of a parent plus its children. Click this button and
select "Size Plus". You can see that it shows the total size of the tree which
includes the treetop and the trunk. The scale values in the Attribute Manager use
these size values as their base and then multiply them. So when you change the
scale value, as we'll do here, you can see that it changes the object's size values
as well. When you're modeling, you want to keep the scale values at 1 so that your
original model will have a nice clean base for animating. And when you're ready to
animate, switch to Object Mode which allows the Scale tool to change the scale
values. And doing this also changes the size values here, which are the ones that
will be keyed. Let's say that the Attribute Manager was closed, but you
still wanted to see the scale values. Just click this button again and select
"Scale." So, that's all fine and good for polygon objects, but when you're using the
Scale tool on a parametric primitive object in Model Mode, it only scales
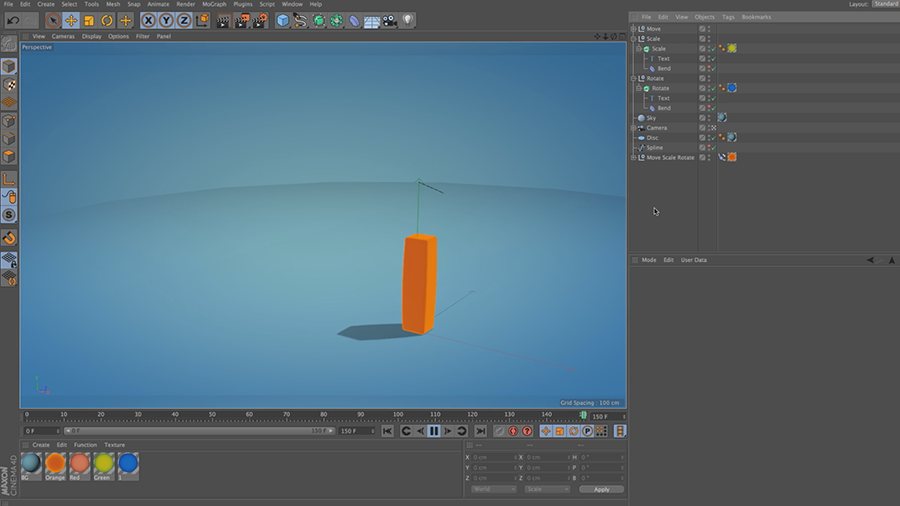
uniformly even when you try to scale on an individual axis. Why is that? Let's use a
primitive cube to make this clearer than with a cone.
It's because parametric primitives are actually just a single point in space, so
there's no real size as defined by each individual X, Y or Z axis.
What you see here is the math that's calculated to create the primitive in the
viewport. So if you want to change the size of the primitive per individual axis,
use its attributes on the Object tab in the Attribute Manager.
Or drag each of the orange handles in the viewport, which does the same thing.
And this is what you want when you are defining the object's original state in
Model Mode. You don't want to affect the scale. The Rotate tool is a little more
straightforward, but it has other special concerns. You can click its icon here or
press the R key, and you can hold down the 6 Sticky Key to temporarily switch to this
tool. We'll just switch to Object Mode, because it makes more sense to rotate
around the object's own axis. You can drag on each individual ring to rotate on only
that axis or drag anywhere in the scene to rotate parallel to the camera so that it
changes with the camera angle. And this is shown by the gray ring here,
or if you want to rotate like you'd use a trackball, you can click anywhere inside
the manipulator and drag. To have each multi-selected object rotate on its own
axis, open the Rotate tool's Attributes and select "per object manipulation."
And to prevent the dreaded gimbal-lock, select the "gimbaling rotation" option,
or you can also change an object's rotation order on the Coordinates tab in
the Attribute Manager. Or use quaternion rotation. One of these methods should work
for you depending on your workflow. One thing that's different from Maya is how
the rotation axes are marked in the Coordinates Manager and the Attribute
Manager. These axes aren't shown in XYZ but instead as HBP. It's the same thing,
but it's just using terminology whose roots are in aeronautics.
Heading, sometimes called "Yah", is rotation around the Y axis.
Pitch is rotation around the X axis, and Bank, sometimes called "Roll",
is rotation around the Z axis. When you rotate and scale objects you often need to
change the location or a rotation of its pivot point which is called the "axis" in
C4D. We'll just switch to Hidden Line Mode to see it better. To modify the axis just
click the Axis Mode button in the left palette or press the L key, and then you
can move or rotate the axis independently. You'll also find some handy axis tools in
the Mesh Axis Center menu. We'll choose the Axis Center tools and then drag the Y
slider to its lowest value which aligns the axis to the base of the object when we
click "execute." But if you want to just pop in quickly and change the axis while
you're working, hold down the L key while you're changing it, then release the key
when you're done. This is sort of like pressing the D key to use the Edit Pivot
tool in Maya. Note that you can't move the axis independently with parametric
primitives, because they're simply a point in space represented by the axis.
So if you move the axis in Axis Mode, its geometry goes along with it.
Now you can see that our treetop rotates and scales from the bottom instead of its
geometric center. If you want, you can freeze an object's transformation values
to set them as the zeroed out position, the same as you would do in Maya.
On the Coordinates tab, expand the Freeze Transformation section and select which
type of transformation you want to freeze or freeze all of them at once.
You can also choose "Tools, Coordinates, Freeze Transformation",
which does the same thing as clicking "Freeze All". When you freeze,
the position and rotation values appear changed to 0 and scale changes to 1.
And notice that the axis doesn't move to the origin, but C4D creates a Null under
the hood that stores your original values as a reference that is shown in the Freeze
section. So when you change your mind and click "Unfreeze All,"
those values are returned as the current transform values. So,
that was a lot of stuff to cover, but hopefully, this video helps clear up any
issues you have with learning how transformations work in C4D.
And here's the cheat sheet with all the keyboard shortcuts we used in this video.
In the next video, we'll grow some flowers for the scene, this time using splines.
このビデオでは、オブジェクトの移動、 スケール、回転から
トランスフォームのフリーズ(座標変換の固定)の追加、 ピボット(Cinema 4Dのいう軸)の修正を見ていきます。
これらの多くのものはMayaでもおなじみですが、
いくつかの落とし穴があるので、それも紹介します。
今日の私たちの目的は、
これらの木を移動して、植林地ではなく 森に見えるようにします。
地形の表示モードを変更すると、 樹木が丘の中に埋まっているのがわかります。
それを解消する必要があります。 移動ツールから始めましょう。
上部のパレットにあるアイコンをクリックするか、 Eキーを押します。
実際には、シーンを開いたときにデフォルトで 有効になっているので、すぐにオブジェクトをドラッグして
動かせるのでとても便利です。
樹冠の部分だけが動いてしまいました。
木全体を一緒に動かしたい場合は、 オブジェクトマネージャで親のヌルを選択する必要があります。
ビューポートのパネルの配置を変更して、
木をXとZ軸に沿って配置しやすくします。
もし、回転ツールなど別のツールが有効な場合は、
[4]キーを押しながら操作すると、 一時的にマニピュレータが変更されなくても
一時的に移動ツールに切り替わります。
キーを離すと、前のツールがもう一度引き継ぎます。
C4Dでは「スティッキーキー」と呼ばれています。
Mayaと同じように、各軸をドラッグするか、 平面に沿ってドラッグして移動もできます。
Mayaとは異なる点が1つあります。 それはマニピュレータに触れたり、
モディファイアキーを使うことなく、 ドラッグするだけで自由に動かせます。
勝手に動かないようにしたい場合は、 上のパレットにある
X、Y、Zのボタンを使って 各軸をロックできます。
たとえば、Y軸をロックするかYキーを押すと、
木はXZ平面内にのみを移動するので、 マニピュレータやモディファイアキーの使用は不要です。
ここでそれぞれの木を左に動かします。
今度はY軸のロックを解除し、 X軸とZ軸をロックするか、XとZキーを押します。
これでY軸方向にだけ木を動かすことができます。 そして、丘の上に持ち上げます。
完了したら、ロックの解除を忘れないでください。
親オブジェクトをトランスフォームすると、 その子オブジェクトも同じようにトランスフォームします。
しかし、親の動きに子を追従させたくない場合もあります。
その場合は、スティッキーキーとして7キーを 押しながら動かすと子は追従しません。
これはMayaの「子の位置の保持」オプションと同じです。 ここではアンドゥをしておきます。
バラバラにはしたくないので元に戻しました。
デフォルトでは、ワールドモードになっており、 上のパレットのここを選択するか、
Wキーを押して切り替えます。 ワールドモードは、Mayaのワールドモードと同じで
グローバル軸に沿ってオブジェクトのトランスフォームを行います。
オブジェクトモードでのオブジェクトのトランスフォームは 自分の座標系に従って移動します。
軸の向きが変わっているのがわかります。 足が上下ではなく、軸に沿って動いています。
Mayaのペアレントモードは、C4Dにないので、 子はオブジェクトモードで
自分の軸に沿って動かします。 それが親と同じか関係なく足を動かせます。
オブジェクトのコンポーネントを トランスフォームすると
オブジェクトモードでの軸に従います。
ご覧のように、足の選択ポイントはこうなります。
Mayaのようなトランスフォームの値は この座標マネージャで表示されます。
ワールドかオブジェクトモードのどちらでも オブジェクトのローカル値が表示されます。
マネージャは、オブジェクト:相対がデフォルトですが、
ワールドやオブジェクト:絶対モードでも 値を表示できます。
ここでは相対モードのままにしておきます。 このマネージャーは言わばミニ版のチャンネルボックスで
マニピュレータの操作よりも、 正確なトランスフォームの値を入力できます。
好きな値を入力するか、矢印を上下にドラッグします。
そして、"適用"をクリックするか、 "Enter"キーを押します。
それで値が実行されます。
Shiftキーを押しながら矢印をドラッグすると 10単位で値が変化し、
Altキーを押すと 0.1単位で変化するのでこれで微調整ができます。
四則演算もこれらでサポートされているので、 相対操作もできます。
たとえば、位置Xの値の後に+60を追加すると60を加算できます。
Y値を2倍にするには、* 2と追加します。
/ 2を追加すると、2で割ることになるので、 地面に戻りました。
基本的な数式ならここに入力できます。 木を後ろに2フィート分動かしたいとします。
しかし、現在のプロジェクト単位であるセンチメートルに 換算した時の値がわかりません。
こうした場合は、+ 2FTと追加するだけで、 正確にセンチに変換されて移動します。
このフィールドで使える関数と演算子を確認するには
オンラインヘルプにある 「付録 / 式」のトピックを参照してください。
属性マネージャのオブジェクトの[座標]タブでも、 トランスフォームの値を変更できます。
ここで、矢印を使って行った変更は、 すぐに反映されます。
位置と角度の値は双方のマネージャで同じですが、
属性マネージャーに表示されているSは、 サイズではなくスケールを表しています。
なぜこれらは違うのでしょうか? C4Dでは、サイズとスケールは表裏一体だからです。
サイズは測定単位における絶対値です。
ご覧の通り座標マネージャで確認できます。 モデルモードの時や
ベースオブジェクトのサイズの設定が行え、 スケールツールを使うか、Tキーで
オブジェクトのサイズを変更できます。 しかし、これはオブジェクトのスケールの値は変更しません。
移動ツールを選択しているときに、 5キーを押した状態にすると、
一時的にスケールツールに切り替わり、 スケールツールが使えます。
次にキーを離すと完了し、 スケールツールに戻ります。
シーン内の好きなところでドラッグすれば、 均等にスケールしたり、
特定の軸や平面でもスケールできます。
もし親と子を含んだ合計のサイズを確認したい場合は、 このボタンをクリックし、「サイズ +」を選択します。
それが樹冠と幹が含まれた樹木の合計サイズを 表示していることがわかります。
属性マネージャのスケール値は、これらのサイズの値をベースとして、 それらを乗算します。
スケール値を変えた場合、 オブジェクトのサイズ値も同じように変更されます。
モデリングするときは、アニメーション用に オリジナルモデルはクリーンなまま
スケール値が1のまま保持されます。 アニメーションの準備ができたら
オブジェクトモードに切り替え、 スケールツールでスケールを変更できるようになります。
これを行うと、ここのサイズの値が変更されキーが作成されます。
たとえば、属性マネージャが閉じられているとして
スケール値を見たい場合は、 もう一度このボタンをクリックしてスケールを選びます。
これは、ポリゴンオブジェクトでは問題ありませんが、
モデルモードでパラメトリックのプリミティブオブジェクトに スケールツールを使う場合、
個々の軸をスケールしようとしても、均等スケールになります。
なぜでしょうか?
プリミティブの立方体をスケールしてみましょう。 これを円錐よりもはっきりとわかります。
パラメトリックなプリミティブは、 実際には空間上のポイントでしかありません。
個々のX、Y、Zの各軸に定義されてる実サイズはありません。
ビューポートで見えているのは、 プリミティブを作成するために数式で計算された結果です。
したがって、個々の軸ごとに プリミティブのサイズを変更したい場合は、
属性マネージャの[オブジェクト]タブでその属性を使用します。
もしくは、ビューポートのオレンジ色のハンドルを それぞれドラッグでもできます。
これはモデルモードで、 オブジェクトの元の状態を編集していることになります。
スケールに影響は与えません。
回転ツールはもう少し単純です。
別の懸念があります。 ここのアイコンをクリックするか、Rキーを押します
スティッキーキーの6キーを押しながら 一時的にこのツールに切り替えることができます
オブジェクト自身の軸を回転させるのがより理にかなっているので、 オブジェクトモードに切り替えます。
各個別のリングをドラッグするだけで回転できます。
シーン内のどこでもドラッグして、 カメラに対して平行に回転させることもできます。
ここでは灰色のリングで示されています、
またはトラックボールのように回転させたい場合は、 内側の任意の場所をクリックしてマニピュレータをドラッグします。
複数選択したオブジェクトをそれぞれ独自に回転させたい場合は
回転ツールのアトリビュートを開き、 [オブジェクトごとに操作]を選択します。
そして恐怖のジンバルロックを防ぐためには "ジンバル回転"オプションを選択するか
または属性マネージャの[座標]タブでオブジェクトの 回転順序を変更することもできます。
もしくは、クォータニオン回転を使用します。 あなたのワークフローに応じて
これらの方法のいずれかがうまく機能するはずです。
Mayaと異なる点は、
回転軸は座標マネージャと属性マネージャで マークされています。
これらの軸はXYZには表示されず、 HBPとして表示されますが、それは同じものです。
しかし、ベースとして航空用語を使用しているだけです。
ヘディングは「ヨー」とも呼ばれ、Y軸を中心に回転します。
ピッチはX軸を中心とした回転で、 バンクは「ロール」とも呼ばれZ軸回りの回転です。
オブジェクトの回転やスケールする場合
C4Dで「軸」と呼ばれるピボットポイントの位置や 角度を変更したいことがあります。
隠線モードに切り替えるだけで、 より見やすくなります。軸を修正するには
左のパレットの軸モードボタンをクリックするか、 Lキーを押します。
すると軸を独立して移動または回転させることができます。
また、メッシュ/軸を中心メニューに便利な軸ツールがあります。
軸ツールを選択して、Yスライダーをドラッグして
最も低い値に設定します。 「実行」をクリックすると、
オブジェクトの底面と軸を揃えます。 しかし、すぐに軸を変更したいときは
Lキーを押した状態にして作業します。 変更が終わったらキーを離します。
これは、Mayaでピボット編集ツールに切り替えるため、 Dキーを押すようなものです。
ただし、パラメトリックプリミティブは、 軸を独立して移動することはできません。
単に軸のところに点だけがあるためです。
したがって、軸モードで軸を移動すると、 ジオメトリも軸に沿って移動します。
これで、樹冠の回転やスケールがジオメトリの中心ではなく、 底面を中心にできるようになりました。
必要に応じて、Mayaと同じように オブジェクトのトランスフォーム値をフリーズして
位置をゼロにすることができます。
[座標軸]タブで、[座標変換を固定]を開き、
全てまたは個別のトランスフォームを フリーズできます。
「ツール / 座標 / 座標変換を固定」を選択することもできます。
これは、「全て固定」をクリックするのと同じです。
フリーズすると、位置と回転の値が0に変わり、 スケールが1に変わります。
軸は原点に移動していませんが、 C4Dは内部的にヌルを作成し
元の値を保持して、参照しています。 元の値は、座標変換の固定欄で確認できます。
ですので気が変わったら、「全て解除」をクリックすると、
元の値が現在の変換値に戻ります。
以上で、このビデオでの紹介は終わりますが、 このビデオがC4Dにおけるトランスフォームの
理解の役に立てば幸いです。
このビデオで使用したすべてのキーボードショートカットを含む 比較表はこちらになります。
次のビデオでは、今回はスプラインを使用してシーンに花を加えます。